Build Custom Doors with These Woodworking Plans for Your Home Renovation
Build Custom Doors: Elevate Your Home Renovation with These Woodworking Plans
Transform your home's aesthetic and functionality with the satisfying project of crafting custom doors. Forget mass-produced, cookie-cutter designs; this guide empowers you to build doors that perfectly match your vision, enhancing your home's character and value. Whether you're a seasoned woodworker or a dedicated DIY enthusiast eager to learn, these detailed plans and step-by-step instructions will guide you through the process, revealing the rewarding experience of creating something truly unique.

Planning Your Custom Door: Measurements and Design
Before you even pick up a saw, meticulous planning forms the cornerstone of any successful woodworking project. Begin by accurately measuring the door opening. Account for the jambs and any existing casings. Don't rush this step; precise measurements prevent costly mistakes later on. Next, decide on your door's style. Do you envision a classic raised panel door, a sleek contemporary design, or something entirely unique? Sketch your design, noting the dimensions of each component – rails, stiles, and panels. Consider the type of wood you'll use; hardwoods like oak, mahogany, or cherry offer durability and elegance, while softer woods like pine are more budget-friendly and easier to work with. Remember to select wood that is appropriately seasoned to prevent warping and cracking.

Choosing the Right Wood and Hardware
The wood you choose directly impacts the door's final appearance and longevity. Hardwoods lend themselves to intricate details and offer superior strength, while softwoods are more forgiving for beginners. Factor in your budget and the overall style of your home when making your selection. Simultaneously, choose your door hardware. This includes hinges, a handle set, and any decorative elements. Ensure the hardware complements your design and is compatible with the thickness of your door.
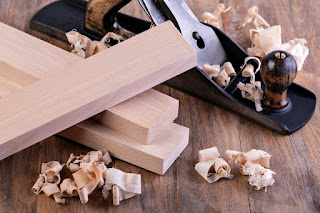
Building the Door Frame: Cutting and Assembly
Now comes the exciting part: the construction itself. Start by cutting the stiles and rails to your precise measurements. Utilize a high-quality miter saw for accurate, clean cuts. Use a router to create decorative profiles on the edges of your rails and stiles. You can also achieve this look with a hand plane if you prefer a more traditional approach. Next, carefully assemble the frame. Using strong wood glue and appropriate joinery (such as mortise and tenon or biscuit joints) will ensure a sturdy and long-lasting door. Clamp the frame tightly and allow the glue to cure completely before moving on to the next step.
Adding the Panels
For a raised panel door, carefully cut and shape the panels to fit snugly within the frame's recesses. Use a router or hand tools to create the raised panel effect. Remember to use a good quality wood glue to adhere the panels to the frame. Apply clamps evenly to ensure a tight fit and prevent warping. For a flat panel door, a simpler process, use a single panel that fits within the frame.
Finishing Touches and Installation
Once the door is assembled, sand it smooth using progressively finer grits of sandpaper. This step is crucial for achieving a flawless finish. Apply a wood stain or paint that complements your home's decor. Apply multiple thin coats, allowing each to dry thoroughly before applying the next. Finally, install your chosen hardware: hinges, handle, and lockset. Precisely aligning the hinges is paramount to ensuring the door hangs correctly. Use shims to adjust for any discrepancies during installation.
Protecting Your Investment
After installation, consider applying a clear topcoat to protect your beautiful custom door from scratches, moisture, and UV damage. This final step not only enhances its aesthetic appeal but significantly prolongs its lifespan. Now step back and admire your handiwork – a truly unique, custom-built door that adds character and value to your home.
Remember: Safety first! Always use appropriate safety equipment such as safety glasses and dust masks when working with woodworking tools.