How to make a wooden gun case with a double-layered design
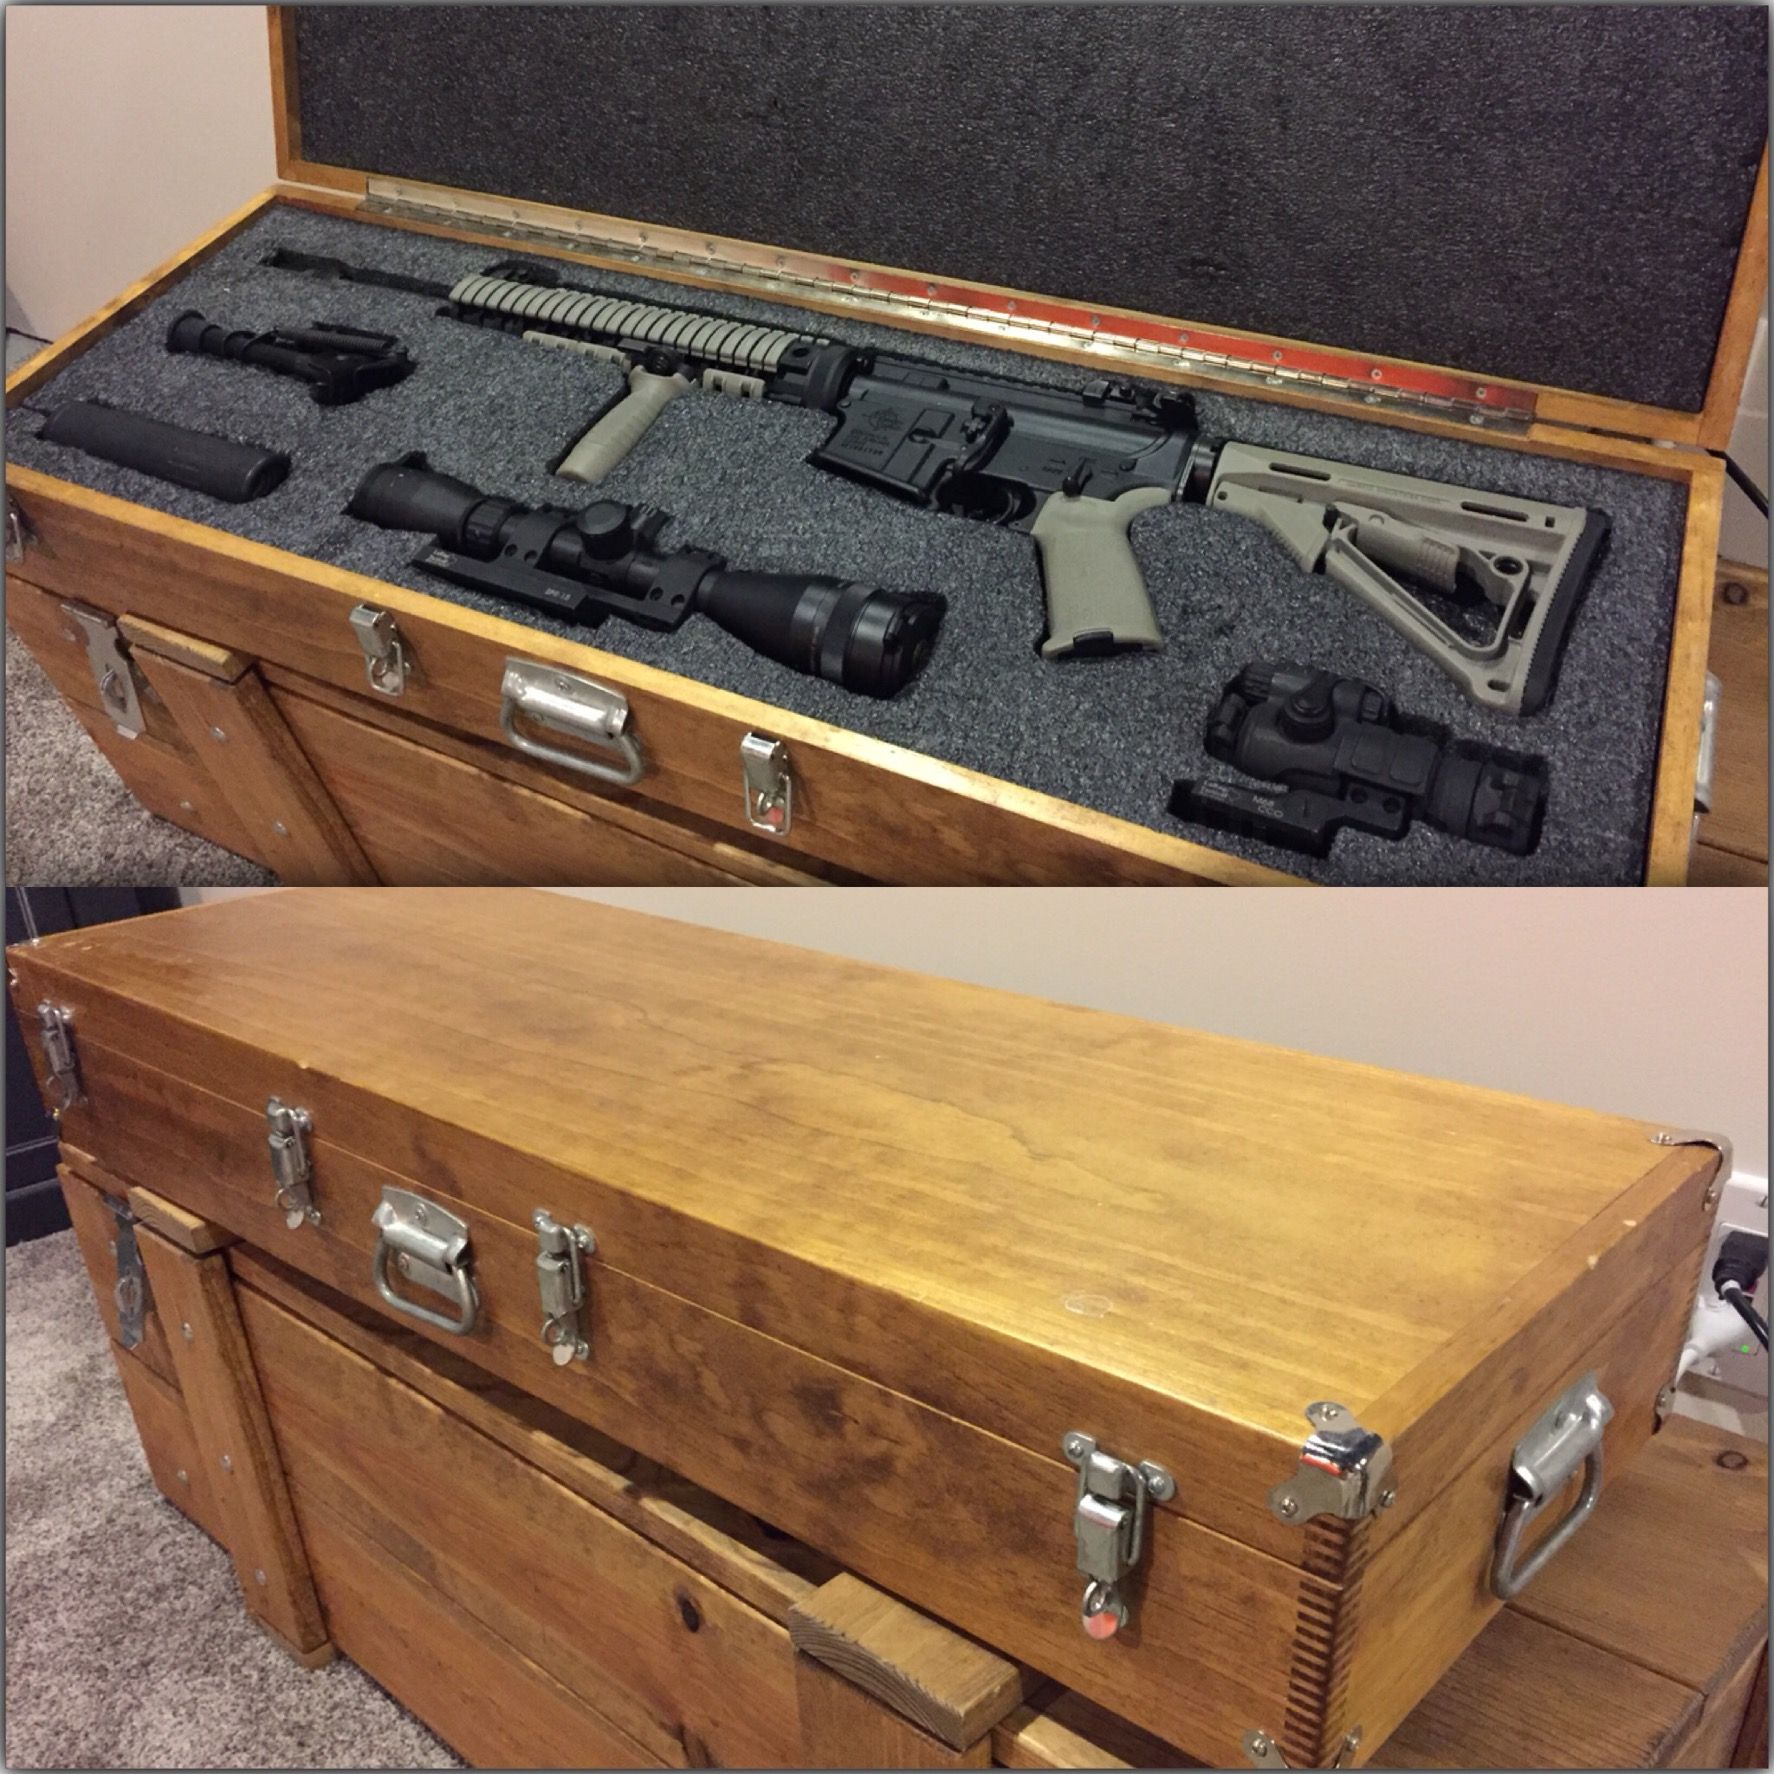
Alright, you want to build a double-layered wooden gun case, huh? That's pretty ambitious, but with some patience and the right tools, you can definitely pull it off. Let me walk you through it like you're sitting right next to me in the workshop.
Step 1: The Planning Phase
First things first, we need to figure out the dimensions of this bad boy. What kind of guns are you planning to store in it? Are we talking about rifles, pistols, or a mix? Once you know the weapons, you can determine the length, width, and depth you'll need. Remember, you'll need extra space for padding and the double layer.
Now, think about the design. Are you going for a simple, classic look, or something more elaborate? Maybe you want to add some decorative elements, like wood carving or inlays? The sky's the limit here, so let your creativity run wild.
Step 2: Gathering Your Tools and Materials
Alright, let's talk about the essentials:
Wood: This is the heart of your project. You'll need a strong and sturdy wood, like maple, oak, or walnut. If you're going for a more budget-friendly option, pine or plywood can work too, just make sure it's thick enough.
Lumber: You'll need wood boards of the dimensions you decided on in the planning phase.
Wood glue: You need a good quality wood glue to ensure a strong bond between your pieces.
Clamps: Lots of clamps are your best friend for this project. You'll need them to hold everything together while the glue dries.
Power tools: A circular saw, jigsaw, sander, and drill will make your life a lot easier. You can always hand-cut and shape your wood, but it'll take a lot longer.
Finishing supplies: You'll need wood filler, stain, varnish, or paint, depending on the finish you want to achieve.
Hardware: This includes hinges, latches, and handles. Choose high-quality hardware, as it will take a lot of wear and tear.
Padding: You'll need some kind of soft padding to protect your guns. Foam, felt, or even old towels can be used.
Measure tape: You can't go wrong with a trusty tape measure!
Pencil: For marking your cuts and measurements.
Safety glasses and gloves: Always wear safety gear when working with wood.
Step 3: Cutting and Assembling the Outer Shell
Alright, let's start building the outer shell of your gun case. Here's what you need to do:
1. Cut your boards: Using your circular saw or jigsaw, cut your boards to the desired length and width. Make sure to double-check your measurements before making any cuts!
2. Assemble the base: Glue and clamp the bottom pieces together to form a solid base. Use wood glue to ensure a strong bond.
3. Assemble the sides: Glue and clamp the side pieces to the base, making sure they are square and flush.
4. Assemble the top: Glue and clamp the top pieces to the sides, creating the lid of your case.
Step 4: Constructing the Inner Layer
Now, we're getting to the fun partâ€"the double layer! Here's how to do it:
1. Cut the inner pieces: Measure the inside of your outer shell and cut pieces of wood to fit snugly inside, creating a frame for the inner layer.
2. Assemble the inner frame: Glue and clamp the inner frame pieces together, ensuring they are square and flush.
3. Attach the inner frame to the outer shell: Carefully position the inner frame inside the outer shell and glue it in place. This creates a secure barrier between your guns and the outer shell.
Step 5: Adding Padding and Interior Features
Now, it's time to make your case comfortable and secure for your precious guns. Here's how to do it:
1. Padding the inner layer: Cut pieces of foam or felt to fit the inside of your inner frame. Glue or staple them in place.
2. Adding dividers: If you're storing multiple guns, you might want to create dividers to separate them. Cut wood strips and glue them to the inner frame to form compartments.
3. Adding hinges and latches: Attach the hinges to the lid and the case, ensuring they are flush and aligned. Install the latches to secure the lid.
4. Adding a handle: Attach a handle to the top of the case for easy carrying.
Step 6: Finishing the Case
Almost there! Now, it's time to give your case that final touch. Here's how:
1. Sanding: Sand the entire case, both inside and outside, to create a smooth surface. Start with coarse grit sandpaper and gradually move to finer grit sandpaper for a smooth finish.
2. Filling gaps and imperfections: Use wood filler to fill any gaps or imperfections in the wood. Let it dry completely before sanding again.
3. Staining or painting: This is where you can get creative. Apply stain, varnish, or paint to achieve the look you want. Apply multiple coats for a durable finish.
4. Adding hardware: Once the finish is dry, attach any decorative hardware like metal accents or brass fittings to enhance the look.
Step 7: The Finishing Touches
Alright, you've done it! You've built a beautiful double-layered wooden gun case. But here's the secret sauce to really make it stand out:
1. Personalization: Add your initials, a family crest, or a favorite quote to make the case uniquely yours.
2. Protective Wax: Apply a layer of protective wax to the finished case to keep it looking good for years to come.
And there you have it! You've just built a top-notch gun case that will keep your firearms safe and secure for years to come. Remember, take your time, enjoy the process, and don't be afraid to experiment. The best gun cases are often the ones that have a little bit of your personality in them. Happy building!


0 comments :
Post a Comment
Note: Only a member of this blog may post a comment.