DIY Multi-Use Blanket Ladders for Extra Storage and Style
DIY Multi-Use Blanket Ladders for Extra Storage and Style
Hey there, fellow organization enthusiasts! Are you constantly battling with overflowing closets and struggling to find a stylish way to store your extra blankets and throws? Well, fret no more! Today we're diving into the world of DIY blanket ladders. Not only are they a practical way to keep your cozy essentials within easy reach, but they also add a touch of charm and rustic elegance to any room.
Think about it. A blanket ladder is like a stylish and functional piece of furniture that can double as an eye-catching accent. It's a win-win, right? Plus, building your own blanket ladder gives you the freedom to customize it to perfectly match your decor and personal style.
Why Choose a DIY Blanket Ladder?
Beyond the obvious storage benefits, building your own blanket ladder offers some serious advantages:
- Cost-Effective: You can create a stunning blanket ladder for a fraction of the price compared to buying one from a store.
- Personalized Style: Choose the perfect wood, stain, and design to perfectly complement your home decor.
- Sense of Accomplishment: Building something yourself is incredibly rewarding, and the pride you'll feel when you're done is priceless.
- Great for Beginners: Don't be intimidated! This project is surprisingly easy, even if you're a DIY novice.
Gathering Your Supplies: It's Time to Shop!
Before you start building, make sure you have everything you need. Don't worry, this list isn't too long, and most of the supplies can be found at your local hardware store.
Materials:
- Wood:
- Two pieces of 1x2 lumber (for the ladder rungs)
- Two pieces of 1x4 lumber (for the ladder sides)
- One piece of 1x6 lumber (for the top shelf)
- Screws: 1 1/4-inch wood screws
- Wood Glue
- Wood Stain (optional, for a finished look)
- Paint (optional, for a colorful touch)
- Sandpaper (for smoothing edges)
- Level (for ensuring your ladder is straight)
- Measuring Tape
- Pencil
- Drill (with a drill bit that matches your screws)
Step-by-Step Building Guide: Let's Get Crafting!
Now that you've gathered your supplies, let's break down the building process into easy-to-follow steps. Don't worry, it's easier than you think!
Step 1: Cut Your Lumber
Using your measuring tape and a pencil, mark the lumber for cutting. For the ladder sides, you'll need two pieces that are the desired height of your ladder (for example, 60 inches). For the ladder rungs, cut pieces that are the desired width of your ladder (for example, 16 inches). Make sure to account for the thickness of the ladder sides when measuring for the rungs. You'll also want to cut the shelf to the desired width for your ladder.
Now, carefully use a saw (hand saw, circular saw, or jigsaw â€" choose what you're most comfortable with) to cut your lumber to the marked lengths. Remember to wear safety glasses during cutting!
Step 2: Sanding and Staining (Optional)
Before assembling, you'll want to smooth out any rough edges by sanding your cut pieces with sandpaper. Start with a rough grit sandpaper (like 80 grit) to remove any imperfections, then gradually move to finer grits (like 120 or 220 grit) for a smoother finish.
If you're going for a stained look, now is the time to apply your chosen wood stain. Let the stain dry completely before moving on to the next step.
Step 3: Assembling the Ladder Sides
Lay your two ladder side pieces down, parallel to each other. Now, place your ladder rungs between the sides. Make sure the rungs are evenly spaced, using your measuring tape to check.
Use wood glue to secure each rung to the ladder sides. Make sure to apply a generous amount of glue along the edges where the rungs meet the sides. Then, secure the rungs with screws. For extra stability, drill pilot holes slightly smaller than the screw size to prevent splitting the wood.
Step 4: Attaching the Top Shelf
Now, place the top shelf on top of the ladder. Position it so that it's centered and securely attached to the ladder sides. Use wood glue and screws to attach the shelf, just like you did with the rungs.
Step 5: Finishing Touches
Once the ladder is assembled, it's time to make it look fantastic! If you chose to paint your ladder, now is the time to add your color. Let the paint dry completely before adding any additional finishing touches.
Step 6: Enjoy!
Congratulations, you just created your very own DIY blanket ladder! Now, find the perfect spot in your bedroom, living room, or any other space where you want to add some cozy storage and stylish charm. Hang your favorite blankets and throws, and admire your handiwork.
Creative Ways to Style Your Blanket Ladder
The beauty of DIY blanket ladders is that they're incredibly versatile! Here are some creative ideas for styling your new creation:
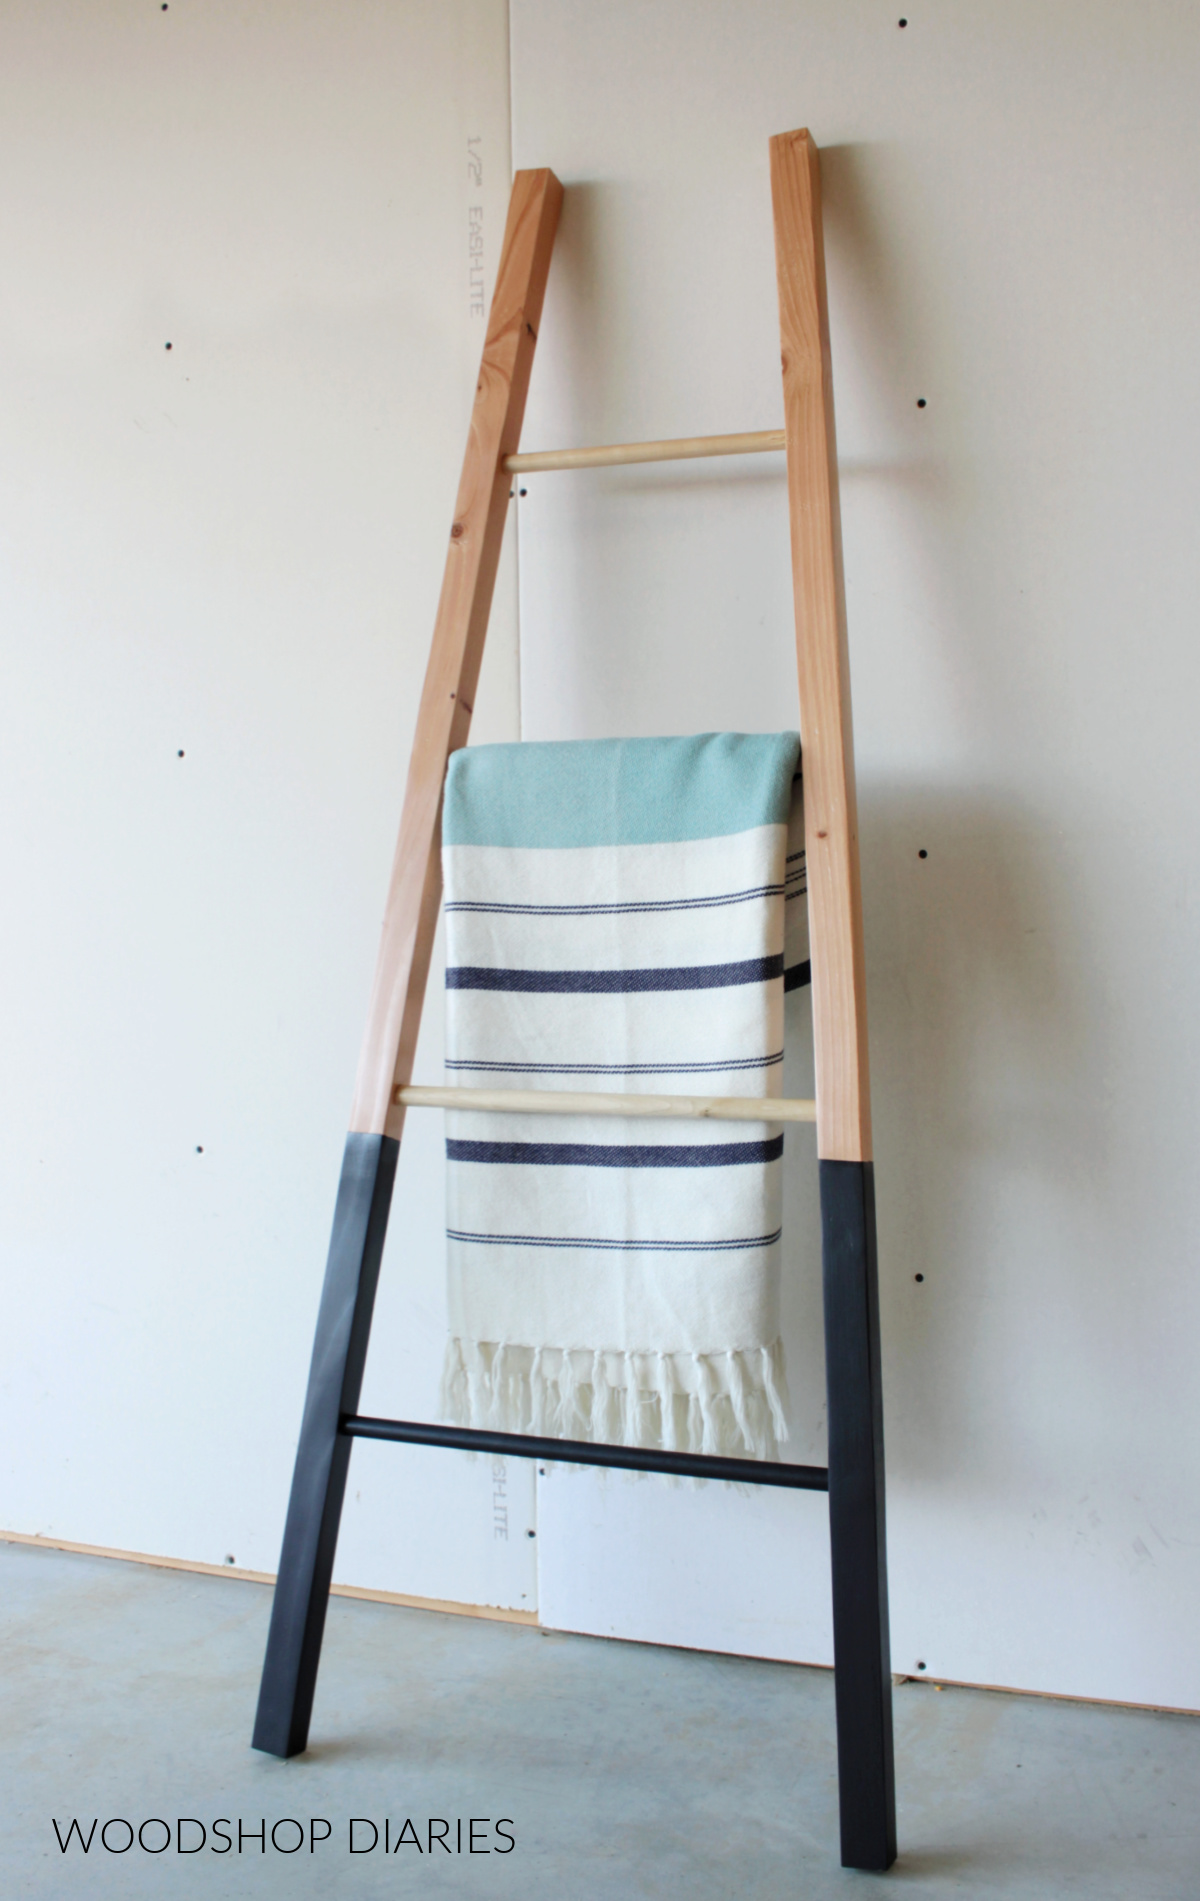
- Throws and Blankets: The classic use, of course! Hang your cozy blankets and throws in a variety of colors and textures for a visually appealing and practical solution.
- Towels and Washcloths: In a bathroom, a blanket ladder can become a stylish towel rack.
- Plants and Vases: Add a touch of greenery by displaying potted plants or vases on the shelf and hanging decorative garlands or vines from the rungs.
- Scarves and Jewelry: In a bedroom, use the ladder to showcase your favorite scarves, jewelry, or hats.
- Decorative Items: Let your creativity run wild! Display framed photos, vintage books, artwork, or other small decorative items.
Commonly Asked Questions
Here are some common questions that you might have about DIY blanket ladders.
Q: What kind of wood should I use for my blanket ladder?
The best wood choice really depends on your personal preference and style. Some popular options include pine (affordable and easy to work with), oak (strong and durable), maple (beautiful grain pattern), and cedar (natural scent and resistance to insects).
Q: How do I make sure my ladder is sturdy?
Use high-quality wood, make sure your cuts are precise, and use plenty of wood glue and screws. You can also add additional support to the ladder by adding diagonal braces or using thicker lumber.
Q: Can I paint my ladder?
Absolutely! Paint is a fantastic way to personalize your ladder and make it match your decor. Choose a color that complements your furniture and walls.
Q: Where should I place my blanket ladder?
The placement depends on where you're storing your blankets or other items. A bedroom wall, living room corner, or even a bathroom wall are all excellent options.
There you have it â€" a comprehensive guide to building your own DIY blanket ladder! You're now equipped with the knowledge and confidence to create a beautiful and functional storage solution for your home. Get ready to impress your friends and family with your creativity and handy skills. Happy crafting!
0 comments :
Post a Comment
Note: Only a member of this blog may post a comment.