Wednesday, February 5, 2025

Build Custom Doors with These Woodworking Plans for Your Home Renovation


Build Custom Doors: Elevate Your Home Renovation with These Woodworking Plans

Transform your home's aesthetic and functionality with the satisfying project of crafting custom doors. Forget mass-produced, cookie-cutter designs; this guide empowers you to build doors that perfectly match your vision, enhancing your home's character and value. Whether you're a seasoned woodworker or a dedicated DIY enthusiast eager to learn, these detailed plans and step-by-step instructions will guide you through the process, revealing the rewarding experience of creating something truly unique.

Planning Your Custom Door: Measurements and Design

Before you even pick up a saw, meticulous planning forms the cornerstone of any successful woodworking project. Begin by accurately measuring the door opening. Account for the jambs and any existing casings. Don't rush this step; precise measurements prevent costly mistakes later on. Next, decide on your door's style. Do you envision a classic raised panel door, a sleek contemporary design, or something entirely unique? Sketch your design, noting the dimensions of each component – rails, stiles, and panels. Consider the type of wood you'll use; hardwoods like oak, mahogany, or cherry offer durability and elegance, while softer woods like pine are more budget-friendly and easier to work with. Remember to select wood that is appropriately seasoned to prevent warping and cracking.

Choosing the Right Wood and Hardware

The wood you choose directly impacts the door's final appearance and longevity. Hardwoods lend themselves to intricate details and offer superior strength, while softwoods are more forgiving for beginners. Factor in your budget and the overall style of your home when making your selection. Simultaneously, choose your door hardware. This includes hinges, a handle set, and any decorative elements. Ensure the hardware complements your design and is compatible with the thickness of your door.

Building the Door Frame: Cutting and Assembly

Now comes the exciting part: the construction itself. Start by cutting the stiles and rails to your precise measurements. Utilize a high-quality miter saw for accurate, clean cuts. Use a router to create decorative profiles on the edges of your rails and stiles. You can also achieve this look with a hand plane if you prefer a more traditional approach. Next, carefully assemble the frame. Using strong wood glue and appropriate joinery (such as mortise and tenon or biscuit joints) will ensure a sturdy and long-lasting door. Clamp the frame tightly and allow the glue to cure completely before moving on to the next step.

Adding the Panels

For a raised panel door, carefully cut and shape the panels to fit snugly within the frame's recesses. Use a router or hand tools to create the raised panel effect. Remember to use a good quality wood glue to adhere the panels to the frame. Apply clamps evenly to ensure a tight fit and prevent warping. For a flat panel door, a simpler process, use a single panel that fits within the frame.

Finishing Touches and Installation

Once the door is assembled, sand it smooth using progressively finer grits of sandpaper. This step is crucial for achieving a flawless finish. Apply a wood stain or paint that complements your home's decor. Apply multiple thin coats, allowing each to dry thoroughly before applying the next. Finally, install your chosen hardware: hinges, handle, and lockset. Precisely aligning the hinges is paramount to ensuring the door hangs correctly. Use shims to adjust for any discrepancies during installation.

Protecting Your Investment

After installation, consider applying a clear topcoat to protect your beautiful custom door from scratches, moisture, and UV damage. This final step not only enhances its aesthetic appeal but significantly prolongs its lifespan. Now step back and admire your handiwork – a truly unique, custom-built door that adds character and value to your home.

Remember: Safety first! Always use appropriate safety equipment such as safety glasses and dust masks when working with woodworking tools.

Sunday, February 2, 2025

Craft an Elegant Buffet with These Woodworking Plans for Dining Rooms


Crafting an Elegant Buffet: Showcasing Exquisite Woodworking in Your Dining Room

The heart of any dining room often lies not just in the table itself, but in the supporting pieces that add character and functionality. A beautifully crafted buffet is more than mere storage; it's a statement piece, a focal point that elevates the entire space. This article explores how carefully chosen woodworking plans can transform your dining room into a haven of refined elegance, showcasing a buffet that seamlessly blends form and function.

Choosing the Perfect Woodworking Plans

Before the first cut is made, careful consideration of your dining room's style and the desired aesthetic of the buffet is paramount. Do you envision a rustic, farmhouse-style buffet brimming with warmth and character? Or perhaps a sleek, modern piece with clean lines and minimalist design? The right woodworking plans will dictate the final look and feel. Explore a variety of plans online or in woodworking magazines, paying attention to details such as:

Key Design Elements to Consider:

  • Wood Species: The type of wood significantly impacts the final aesthetic. Rich, dark woods like cherry or walnut convey a sense of sophistication, while lighter woods like maple or oak offer a brighter, more airy feel. Consider the existing furniture and flooring in your dining room when selecting wood.
  • Style: From traditional to contemporary, Shaker to Mission, the style of the buffet should complement your existing décor. Choose plans that align with your preferred design aesthetic.
  • Size and Scale: Ensure the buffet's dimensions are appropriate for the available space in your dining room. Too large, and it will overwhelm the room; too small, and it will appear insignificant.
  • Functionality: Consider your storage needs. Do you require ample drawer space, open shelving, or a combination of both? The woodworking plans should accommodate your specific requirements.

The Construction Process: A Journey of Craftsmanship

With the perfect woodworking plans selected, the construction phase begins. This is where the true artistry unfolds. Precise measurements, careful cuts, and meticulous joinery are crucial to achieving a flawless finished product. Take your time, and don't rush the process. A well-constructed buffet will last for generations.

Essential Tools and Techniques:

  • Precise Measurement and Cutting: Accuracy is paramount. Use high-quality measuring tools and a sharp saw to ensure clean, precise cuts.
  • Joinery Techniques: Explore various joinery methods, such as mortise and tenon, dovetail, or biscuit joints, to create strong and aesthetically pleasing connections.
  • Finishing Touches: The finishing process is just as important as the construction. Sanding the wood to a smooth finish and applying a high-quality stain or varnish will protect the wood and enhance its natural beauty. Consider using a clear coat to protect the wood's finish from scratches and spills.

Displaying Your Masterpiece: The Final Reveal

Once complete, the buffet becomes more than just furniture; it's a testament to your craftsmanship and dedication. Its presence elevates the dining room's ambiance, creating a warm and inviting atmosphere. Position your newly crafted buffet strategically – perhaps as a centerpiece against a feature wall, or flanking a fireplace. Consider styling the top with carefully chosen decorative items to complete the look. Whether showcasing heirloom china, carefully selected glassware, or simply a beautiful centerpiece, your custom-built buffet becomes a showcase for your personal style and refined taste. It's a piece that will be admired and enjoyed for years to come, a true legacy in your home.

Affordable Woodworking Tool Plans for Beginners


Affordable Woodworking Tool Plans for Aspiring Craftsmen

Embarking on the rewarding journey of woodworking often presents a significant hurdle: the initial investment in tools. While high-quality professional equipment is desirable, it's not a prerequisite for beginners. This article outlines a strategic approach to acquiring affordable woodworking tools, focusing on essential items and prioritizing functionality over brand prestige. By carefully selecting tools and planning projects, aspiring woodworkers can create beautiful and functional pieces without breaking the bank.

Essential Hand Tools: A Foundation for Success

Before investing in power tools, a solid foundation in hand tools is crucial. These tools not only provide invaluable experience in manipulating wood but also serve as indispensable complements to power tools, enhancing precision and control.

Measuring and Marking

Accurate measurement is paramount in woodworking. A measuring tape (at least 6 feet) and a combination square are fundamental. The combination square allows for marking perpendicular lines, checking angles, and measuring depths. A marking gauge aids in creating consistently spaced parallel lines, essential for joinery and shaping. Finally, a pencil specifically designed for wood is a crucial but often overlooked element. Sharp pencils leave precise marks, improving accuracy.

Cutting and Shaping

A selection of chisels is essential for shaping wood, creating joints, and removing material. Start with a set containing a 1/4", 1/2", and 3/4" chisel. These sizes cover a wide range of tasks. A hand saw, such as a tenon saw or a coping saw, allows for precise cuts where a power saw is impractical or undesirable. A block plane is useful for smoothing surfaces and removing small amounts of material, while a smoothing plane refines surfaces to a fine finish. Consider adding a wood rasp for shaping curves and removing material quickly.

Clamping and Holding

Securely holding wood during assembly and shaping is crucial. Begin with a few bar clamps, selecting sizes based on the typical dimensions of the projects you anticipate undertaking. A hand screw clamp is also valuable for smaller workpieces and intricate assemblies. These clamps provide the necessary holding power without substantial financial investment.

Safety Equipment

Safety should never be compromised. Safety glasses are non-negotiable for protecting your eyes from flying debris. A dust mask protects your lungs from inhaling wood dust, particularly essential when working with hardwoods. Consider work gloves to protect your hands from splinters and abrasions. These essential safety items are readily available at reasonable prices.

Affordable Power Tool Selection: Enhancing Efficiency

Once a solid foundation in hand tools is established, power tools can significantly enhance efficiency and expand the range of projects achievable. However, it's crucial to choose wisely, focusing on versatility and value.

The Versatile Circular Saw

A circular saw is a highly versatile tool for making rip cuts (along the grain) and crosscuts (across the grain). It's essential for cutting dimensional lumber to size and creating components for larger projects. Opt for a model with a decent motor and a good blade for clean cuts. While more expensive models boast features like laser guides, a basic, well-maintained circular saw provides excellent value.

The Essential Drill/Driver

A cordless drill/driver is another invaluable tool. It's used for drilling pilot holes (to prevent wood from splitting), driving screws, and driving bits for various tasks. A rechargeable lithium-ion battery offers portability and extended run time. Choose a model with a variable speed setting for better control.

Sanding Solutions

Efficient sanding is essential for a smooth, professional finish. A random orbital sander is excellent for smoothing surfaces and removing imperfections. Consider purchasing a variety of sandpaper grits to address different stages of the sanding process, from coarse to fine. This combination helps achieve a smooth, even finish without excessive manual effort.

Budget-Friendly Alternatives

Consider exploring used power tools from reputable sources. Many well-maintained used tools are available at significantly reduced prices. Inspecting the tools thoroughly before purchase is crucial to ensure functionality and safety. Additionally, renting tools for specific projects can prove cost-effective if you only need them occasionally.

Strategic Project Planning: Maximizing Your Tool Investment

Choosing the right projects is as important as selecting the right tools. Beginning with simple projects allows you to hone your skills and become comfortable with your tools before tackling more complex designs.

Beginner-Friendly Projects

  • Simple shelves: A straightforward project to practice basic cuts, assembly, and finishing techniques.
  • Small boxes: These projects introduce you to joinery techniques like rabbet joints or miter joints.
  • Cutting boards: A practical project that allows you to practice various finishing methods.
  • Birdhouses: A charming and fun project that teaches you about planning, shaping, and assembly.
  • By starting with simpler projects, you'll gain experience and confidence, allowing you to gradually tackle more demanding projects as your skills and tool collection evolve. This approach maximizes the value of your initial investment and minimizes frustration.

    Conclusion: A Sustainable Path to Woodworking Mastery

    Becoming a skilled woodworker requires dedication, practice, and a strategic approach to tool acquisition. By focusing on essential hand tools initially and strategically adding affordable power tools, aspiring craftsmen can build a solid foundation without incurring excessive costs. Careful planning, choosing beginner-friendly projects, and prioritizing safety are critical aspects of a sustainable path to woodworking mastery. Remember that the journey of learning is as rewarding as the finished product, and each project contributes to your growth and expertise.

    Design Custom 4 Furniture for Your Home and Office with These Plans


    Bespoke Furniture Designs for Home and Office: A Comprehensive Approach

    This document outlines the design specifications for four unique pieces of furniture, two intended for a home environment and two for a professional office setting. Each design prioritizes both aesthetic appeal and practical functionality, incorporating high-quality materials and ergonomic considerations where appropriate. The detailed plans aim to provide a comprehensive understanding of the furniture's construction and intended use.

    Home Furniture: Enhancing Residential Spaces

    The home furniture designs focus on creating comfortable and visually appealing pieces that complement a modern yet classic aesthetic. Emphasis is placed on the use of sustainable and durable materials, ensuring longevity and minimizing environmental impact.

    1. Modular Bookshelf System for Living Room

    This design proposes a modular bookshelf system, allowing for adaptable configurations to suit varying space constraints and aesthetic preferences. The system utilizes a combination of solid oak and powder-coated steel components. The oak provides a warm, natural aesthetic, while the steel offers structural integrity and a contemporary touch.

    Materials:

    • Solid oak shelving units (various sizes)
    • Powder-coated steel frame components (vertical supports and connectors)
    • High-quality wood screws and bolts
    • Optional: integrated LED lighting strips

    Construction Details:

    The oak shelving units will be meticulously crafted with dovetail joinery for strength and durability. Each unit will feature a consistent depth of 12 inches and varying widths (12, 24, and 36 inches) to allow for flexible arrangements. The steel frame components will be powder-coated in a matte black finish for a sleek and understated appearance. The system is designed to be easily assembled and reconfigured without the need for specialized tools. Optional integrated LED lighting strips can be seamlessly incorporated into the top shelves for ambient lighting. The overall height of the assembled system is designed to be flexible and adaptable to the specific needs of the space, capable of extending up to 8 feet. Each oak shelf will be able to support a minimum weight of 50 lbs. distributed evenly.

    Ergonomic Considerations:

    The shelves are positioned at heights optimal for easy access to books and other items, avoiding the need for excessive reaching or bending. The modular nature of the system allows for customized height adjustments, further improving accessibility.

    2. Custom-Designed Upholstered Armchair for Reading Nook

    This design focuses on creating a comfortable and stylish armchair specifically tailored for a reading nook or quiet corner. The armchair will be upholstered in high-quality, durable fabric with a focus on comfort and visual appeal. The frame will be constructed from sustainably sourced hardwood for strength and longevity.

    Materials:

    • Sustainably sourced hardwood frame (e.g., walnut or cherry)
    • High-density foam cushioning
    • High-quality upholstery fabric (customer choice)
    • Durable, high-gauge thread for stitching

    Construction Details:

    The hardwood frame will be carefully constructed using traditional joinery techniques to ensure structural integrity and longevity. The frame will be designed with ergonomic considerations in mind, including a slightly reclined backrest and well-padded armrests. High-density foam cushioning will provide optimal comfort and support. The upholstery fabric will be carefully chosen for its durability, aesthetics, and ease of cleaning. The choice of fabric color and pattern will depend on the customer's preferences, providing complete customization. The chair will also incorporate high-gauge thread and double stitching to ensure the longevity of the seams. The overall design prioritizes a clean and classic look while optimizing comfort for extended periods of sitting.

    Ergonomic Considerations:

    The armchair's design prioritizes ergonomic comfort. The backrest is carefully angled to provide proper lumbar support, while the seat depth and cushion firmness are designed to avoid pressure points and promote comfortable posture. The armrests are positioned at a height conducive to relaxed arm placement and posture maintenance.

    Office Furniture: Optimizing Professional Workspaces

    The office furniture designs focus on maximizing productivity and creating a professional yet comfortable workspace. Ergonomics and functionality are key considerations, along with a clean, modern aesthetic.

    3. Adjustable Height Standing Desk

    This design incorporates a height-adjustable standing desk to promote better posture and encourage movement throughout the workday. The desk's design prioritizes both functionality and a sleek, professional appearance. The construction utilizes high-quality materials designed for durability and longevity.

    Materials:

    • Solid wood desktop (e.g., maple or birch)
    • Powder-coated steel frame with adjustable height mechanism
    • Durable casters (optional, for mobility)
    • Cable management system

    Construction Details:

    The solid wood desktop will be crafted from high-quality maple or birch, providing a sophisticated and durable surface. The powder-coated steel frame will incorporate a reliable and smooth-operating height adjustment mechanism, allowing the user to easily transition between sitting and standing positions. Optional casters will add mobility, allowing for easy relocation of the desk within the office space. A built-in cable management system will ensure a tidy and organized workspace. The desk will be designed to support a minimum weight of 150 lbs distributed evenly across the surface.

    Ergonomic Considerations:

    The adjustable height mechanism is the core ergonomic feature, allowing users to customize their workspace to optimal heights for both sitting and standing positions. This helps reduce back strain and promotes healthier posture throughout the workday. The wide desktop surface provides ample space for various work-related items, promoting a less cluttered workspace and improved workflow.

    4. Executive Office Chair with Lumbar Support

    This design focuses on providing a comfortable and supportive executive office chair that promotes good posture and reduces fatigue during long work sessions. The chair will feature premium materials and advanced ergonomic design elements.

    Materials:

    • High-quality leather or breathable fabric upholstery
    • Aluminum or steel frame with adjustable mechanisms
    • High-density foam cushioning with lumbar support
    • Adjustable armrests and headrest (optional)

    Construction Details:

    The chair's frame will be constructed from durable aluminum or steel for optimal strength and stability. The upholstery will be high-quality leather or breathable fabric, offering both comfort and a professional aesthetic. The cushioning will utilize high-density foam for long-lasting support and comfort. A key feature will be adjustable lumbar support to customize the chair to individual needs and maintain proper spinal alignment. Adjustable armrests and a headrest are optional features that can further enhance comfort and support. The chair's base will incorporate a five-star base with smooth-rolling casters for easy mobility and stability. The adjustment mechanisms will be designed for smooth and easy operation.

    Ergonomic Considerations:

    The chair's design prioritizes optimal ergonomic support. The adjustable lumbar support is crucial for maintaining proper spinal alignment and reducing back strain. Adjustable armrests allow for personalized support and reduce shoulder tension. The high-density foam cushioning provides comfortable seating for extended periods, and the ability to adjust the chair's height is critical to ensure proper leg positioning.

    These detailed plans represent a comprehensive approach to bespoke furniture design for both home and office environments. The designs prioritize both aesthetics and functionality, incorporating high-quality materials and ergonomic considerations to create furniture pieces that are both visually appealing and conducive to a comfortable and productive lifestyle.

    Classic American Furniture Plans for a Timeless Home Aesthetic


    Classic American Furniture Plans for a Timeless Home Aesthetic

    Step into a world of enduring elegance with classic American furniture. These designs, born from a rich history of craftsmanship and practicality, offer a timeless aesthetic that transcends fleeting trends. Forget disposable decor; embrace the enduring beauty of pieces built to last, imbued with a sense of heritage and quality that only handcrafted furniture can provide. This article explores the enduring appeal of classic American furniture plans and empowers you to create your own heirloom pieces.

    Understanding the Classic American Style

    Classic American furniture styles encompass a diverse range of influences, primarily rooted in the colonial era and evolving through various periods. Simplicity, functionality, and natural materials are hallmarks of these designs. Think Shaker-inspired minimalism with its clean lines and unadorned surfaces, or the graceful curves and rich details of Queen Anne pieces. Early American furniture, often made from sturdy hardwoods like cherry, maple, and oak, reflects a practicality born from necessity, showcasing robust joinery and a focus on lasting durability. The enduring charm lies not only in its beauty but also in its enduring quality – a testament to the craftsmanship of a bygone era.

    Key Characteristics to Identify

    Identifying classic American furniture involves understanding its defining features. Look for:

    • Simple, clean lines: Avoid overly ornate detailing.
    • High-quality materials: Solid hardwoods like oak, cherry, maple, and walnut are commonly used.
    • Functional design: Pieces serve a purpose and are built for lasting use.
    • Traditional joinery: Dovetail joints, mortise and tenon joints, and other traditional techniques demonstrate superior craftsmanship.
    • Natural wood finishes: Often showcasing the natural beauty of the wood grain.

    Finding and Utilizing Classic American Furniture Plans

    Numerous resources exist for accessing detailed plans to build your own classic American furniture. Online archives, antique furniture books, and woodworking websites offer a wealth of information. Start by identifying the specific style that resonates with you – perhaps the understated elegance of Shaker furniture or the more ornate detailing of Federal-style pieces. Once you've selected a design, meticulously examine the plans, understanding each step before beginning the project. Remember, precision is paramount in woodworking; taking your time and ensuring accurate measurements will yield superior results.

    Resources for Discovering Plans

    Your journey to crafting classic American furniture begins with the right resources. Consider these options:

    • Online woodworking forums and communities: Connect with experienced woodworkers who can offer guidance and advice.
    • Antique furniture books and magazines: Often feature detailed illustrations and construction details.
    • Digital plan repositories: Many websites offer downloadable plans for various furniture styles.
    • Local libraries and historical societies: May have access to rare or unique plans.

    Bringing Your Vision to Life: Construction and Finishing

    Constructing your furniture requires careful planning and execution. Choose the right tools and materials, ensuring that your wood is properly seasoned and free from defects. Follow the plans meticulously, paying close attention to joinery techniques. Take your time; rushing the process often leads to errors. Once the construction is complete, focus on finishing. Classic American furniture often features simple, natural finishes that highlight the wood grain. Consider using traditional techniques like hand-rubbed oil finishes or shellac to achieve an authentic look.

    Tips for Success

    To achieve optimal results, remember these crucial tips:

    • Choose high-quality wood: The foundation of any fine piece of furniture.
    • Use appropriate tools: Invest in good quality hand tools or power tools as needed.
    • Practice precision: Accurate measurements and joinery are critical.
    • Sanding is key: Smooth surfaces contribute to a beautiful finish.
    • Protect your finished piece: Apply a quality finish to protect the wood from damage.

    Building classic American furniture is a rewarding experience, connecting you to a rich heritage of craftsmanship. The journey may require patience and skill, but the resulting pieces will become cherished heirlooms, adding lasting beauty and character to your home for generations to come.

    Picnic Table Woodworking Plans for Family Gatherings


    Building Your Dream Picnic Table: A Family-Friendly Guide

    Hey there, fellow woodworking enthusiasts! So, you're dreaming of building a beautiful, sturdy picnic table for those awesome family gatherings? Fantastic! There's nothing quite like the feeling of creating something with your own two hands, especially something that will bring your family together for years to come. This guide will walk you through the process, from choosing the right wood to the final sanding. Let's get started!

    Choosing Your Wood: Strength and Style

    The heart of any great picnic table is its wood. You want something strong enough to withstand the rigors of outdoor use and regular family fun, but also something that looks good doing it! Here are a few popular choices:

    Pressure-Treated Lumber: The Workhorse

    Pressure-treated lumber is a popular choice for outdoor projects. It's resistant to rot, insects, and decay, making it a durable option that can stand up to the elements. However, the chemicals used in the treatment process can be a concern for some, so be sure to choose a product that meets your safety standards. It also tends to have a less aesthetically pleasing look, but function over form is important sometimes, right?

    Cedar: Natural Beauty and Durability

    Cedar is a beautiful, naturally rot-resistant wood. It's more expensive than pressure-treated lumber, but its rich color and pleasant aroma make it a worthwhile investment for many. Plus, it weathers beautifully over time, developing a lovely silvery-grey patina.

    Redwood: The Classic Choice

    Redwood is another excellent option for outdoor projects. It's known for its strength, durability, and resistance to rot and insects. Like cedar, it's more expensive than pressure-treated lumber, but its longevity makes it a smart long-term investment.

    Planning Your Design: Size and Style Considerations

    Before you even think about picking up a saw, you need a plan! Consider these factors:

    Table Size: How Many Guests?

    How many people do you typically have at your family gatherings? A standard picnic table is around 6 feet long, but you can easily adjust the length to fit your needs. Consider adding a few extra feet if you often have larger crowds. Don't forget to account for the seating – allowing at least 24 inches per person is crucial for comfort.

    Table Height: Comfort is Key

    Standard picnic table height is around 28-30 inches. This height is comfortable for most adults and children, but if you have particularly tall or short family members, you might want to adjust accordingly. You can find plans online to adjust this if necessary.

    Style: Rustic Charm or Modern Elegance?

    Do you envision a rustic, farmhouse-style picnic table, or something sleeker and more modern? Your choice of wood and the overall design will significantly impact the final look. Consider adding decorative elements like carved legs or a unique bench design to personalize your table.

    Gathering Your Tools and Materials

    Now for the fun part – getting your tools ready! You'll need a good assortment, but most of them are standard woodworking tools. If you don't have everything, you can always rent tools from your local hardware store.

    • Measuring Tape
    • Saw (Circular saw or miter saw recommended)
    • Drill with various drill bits
    • Screwdriver (or impact driver)
    • Level
    • Clamps
    • Safety Glasses
    • Wood Glue
    • Exterior-grade wood screws
    • Sandpaper (various grits)
    • Wood stain or sealant (optional)

    Step-by-Step Construction: Building Your Masterpiece

    This is where the magic happens! Detailed plans with diagrams can be found online (search for "picnic table woodworking plans"), but here's a general overview:

    Cutting the Lumber: Precision is Key

    Carefully cut all your lumber to the specified dimensions according to your chosen plan. Accuracy is crucial at this stage, as any errors will be magnified as you build.

    Assembling the Tabletop: Strength and Stability

    Most plans will have you create the tabletop first. Use wood glue and screws to join the planks securely. Make sure your tabletop is perfectly flat and level.

    Constructing the Legs and Supports: Solid Foundation

    Build the legs and support structures, ensuring they're sturdy and plumb. Use strong screws and consider adding extra bracing for increased stability. Your design will determine how this step is done.

    Attaching the Tabletop to the Legs: The Final Connection

    Once the legs are in place and secured, carefully attach the tabletop. Make sure it's level and centered, using clamps to ensure everything aligns correctly.

    Sanding and Finishing: The Finishing Touches

    Sand all surfaces smooth, starting with coarser grit sandpaper and gradually moving to finer grits. Apply a wood stain or sealant to protect the wood from the elements and enhance its beauty. Allow the sealant to dry completely before using the table.

    Tips for Success

    • Pre-drill holes: This will prevent the wood from splitting when you drive in the screws.
    • Use clamps: Clamps will keep everything aligned and secure while the glue dries.
    • Take your time: Rushing the process can lead to mistakes. Patience is key!
    • Have fun! Building your picnic table should be an enjoyable experience.

    Commonly Asked Questions

    Here are some questions people frequently ask about building picnic tables:

    Q: What's the best type of wood for a picnic table?

    A: Pressure-treated lumber is durable and affordable, while cedar and redwood offer natural beauty and rot resistance. The choice depends on your budget and aesthetic preferences.

    Q: How long does it take to build a picnic table?

    A: This varies greatly depending on your experience and the complexity of the plan. Expect to spend anywhere from a weekend to several days on the project.

    Q: Do I need any special tools?

    A: A circular saw, drill, clamps, and a level are essential. Other tools, like a miter saw, can make the job easier but aren't strictly necessary.

    Q: How do I prevent the wood from rotting?

    A: Using pressure-treated lumber or naturally rot-resistant wood like cedar or redwood is a good start. Applying a quality exterior-grade wood sealant will further protect the wood from moisture and decay.

    Q: Can I build a picnic table with my kids?

    A: Absolutely! Building a picnic table can be a fantastic family project, but ensure adult supervision is always present, especially when using power tools. Assign age-appropriate tasks to get everyone involved.

    Happy building! I hope this guide gives you the confidence to tackle this rewarding project. Remember to always prioritize safety, and most importantly, have fun creating lasting memories with your family.

    Saturday, January 25, 2025

    How to Build a Wooden Picture Frame with a Hidden Back Panel


    Crafting a Hidden Compartment Picture Frame: A Step-by-Step Guide

    Tired of generic picture frames? Yearning for a touch of mystery and intrigue? This project will guide you through building a beautiful wooden picture frame with a cleverly concealed back panel, perfect for hiding small treasures or secret messages. Prepare to unleash your inner craftsman and create a truly unique piece!

    Gathering Your Materials and Tools

    Before you begin, gather all the necessary materials. Accurate measurements are crucial for a seamless fit, so take your time with this step. For this project, you'll need:

    • Wood: Choose a wood type that complements your décor. Pine, oak, or even reclaimed wood offer distinct aesthetics. You'll need enough to create four frame pieces (plus extra for potential mistakes).
    • Measuring Tape and Pencil: Essential for precise measurements and marking your cuts.
    • Miter Saw or Hand Saw: A miter saw ensures perfectly angled cuts, but a sharp hand saw works just as well with patience.
    • Wood Glue: A high-quality wood glue forms a strong bond between the frame pieces.
    • Clamps: Essential for holding the frame pieces together while the glue dries securely.
    • Sandpaper (various grits): Smooth out any rough edges and create a polished finish. Start with coarser grits and progress to finer ones.
    • Wood Stain or Paint (optional): Customize the frame's look to match your preferences.
    • Clear Finish (optional): Protect the frame from wear and tear, enhancing its longevity.
    • Small Hinges: These will connect the hidden back panel to the main frame.
    • Small Magnet and Matching Metal Plate (optional): A discreet alternative to hinges for closing the hidden panel.
    • Picture hanging hardware: Sawtooth hanger, D-rings, or wire.

    Cutting and Assembling the Frame

    Measuring and Cutting the Wood

    Begin by carefully measuring the dimensions of your chosen picture. Add approximately 1.5 inches to each side to determine the frame's outer dimensions. Cut four pieces of wood to these dimensions at a 45-degree angle using your miter saw or hand saw. Ensure the cuts are clean and precise for a perfect fit. Always err on the side of slightly larger cuts, as you can always sand down excess material.

    Joining the Frame Pieces

    Apply a thin bead of wood glue to the angled edges of two adjacent frame pieces. Firmly clamp them together, ensuring the joint is tight and flush. Repeat this process until all four pieces are joined, creating a complete frame. Let the glue dry completely according to the manufacturer's instructions.

    Sanding and Finishing the Frame

    Once the glue is dry, carefully remove the clamps. Use sandpaper to smooth out any rough edges, imperfections, or excess glue. Start with a coarser grit sandpaper and gradually move to finer grits for a polished finish. Apply your chosen wood stain, paint, or clear finish, allowing each coat to dry completely before applying the next. This step adds both protection and visual appeal.

    Creating the Hidden Back Panel

    Measure the interior dimensions of the assembled frame. Cut a piece of wood slightly smaller than these dimensions to create the hidden back panel. This slightly smaller size ensures it fits snugly within the frame without being visible from the front. Sand the edges of the panel smooth.

    Attaching the Hidden Panel and Hardware

    If using hinges, carefully attach them to the back panel and the inside of the frame, ensuring they allow the panel to open and close smoothly. If opting for a magnet and metal plate system, attach the magnet to the inside of the frame and the metal plate to the back panel. Finally, attach your chosen picture hanging hardware to the back of the frame for easy display.

    Finishing Touches and Display

    Insert your chosen photograph or artwork carefully. Admire your handcrafted picture frame with its ingenious hidden compartment. You’ve successfully created a unique piece that combines beauty and functionality, perfect for showcasing memories while safeguarding precious small items!

    Wednesday, November 20, 2024

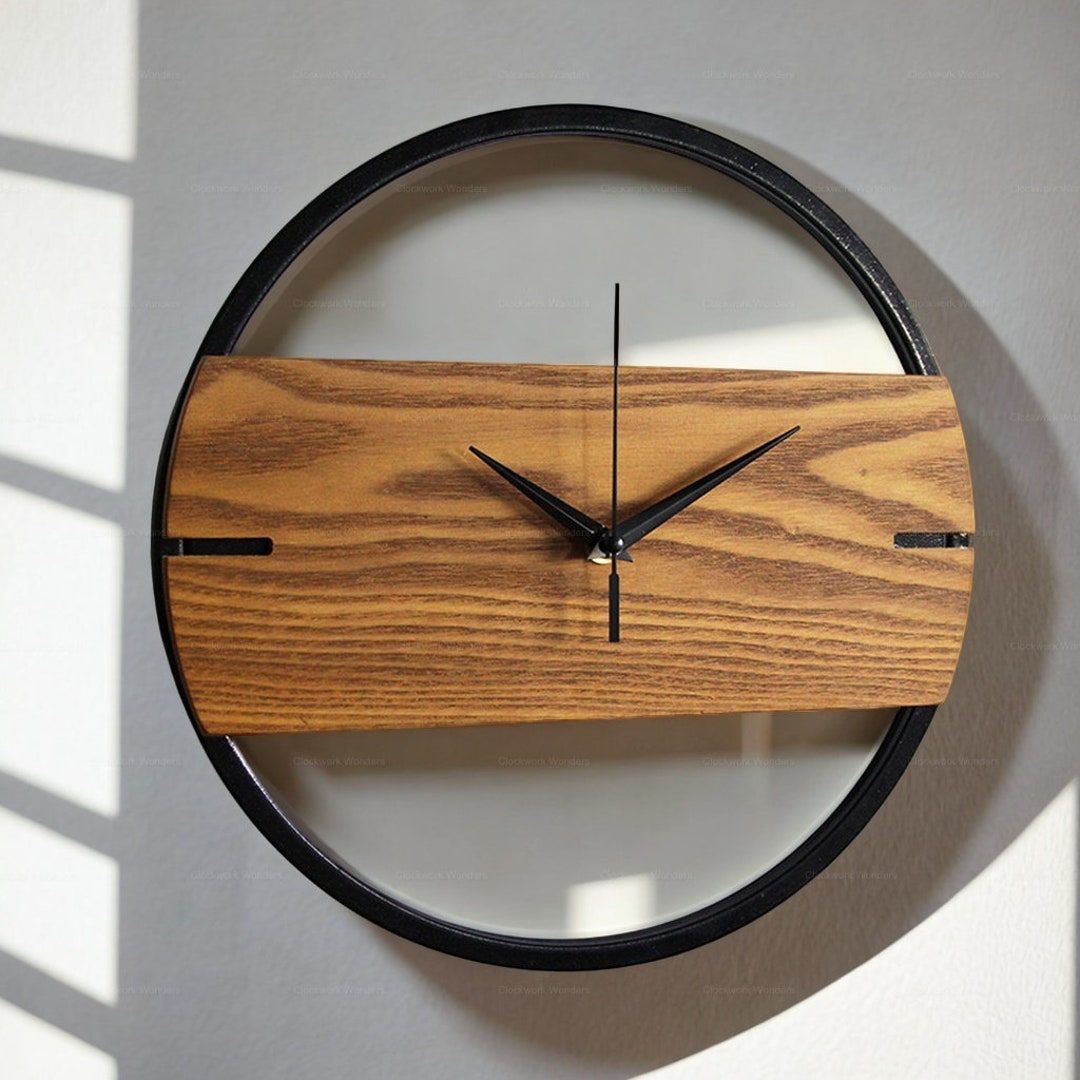
    Wooden Wall Clocks with Minimalist Designs That Shoppers Love


    Wooden Wall Clocks with Minimalist Designs That Shoppers Love

    Wooden Wall Clocks with Minimalist Designs That Shoppers Love

    In the realm of interior design, the humble wall clock has transcended its utilitarian purpose, becoming a statement piece that reflects personal style and aesthetic sensibilities. Among the myriad of clock designs available, minimalist wooden wall clocks have emerged as a popular choice for discerning shoppers. Their clean lines, natural warmth, and understated elegance seamlessly blend into diverse decor styles, adding a touch of sophistication and timeless appeal to any space.

    The Allure of Minimalism in Interior Design

    Minimalist design principles prioritize simplicity, functionality, and a sense of order. By eliminating unnecessary embellishments and focusing on essential elements, minimalist aesthetics create a serene and calming ambiance. This philosophy resonates deeply with modern lifestyles, where clutter and distractions are often overwhelming.

    Wooden wall clocks, with their inherent natural beauty and tactile appeal, perfectly embody the minimalist ethos. The warm hues and intricate grain patterns of wood evoke a sense of tranquility and connection to nature, while the absence of excessive ornamentation allows the clock's form and function to take center stage.

    Benefits of Wooden Wall Clocks with Minimalist Designs

    The popularity of minimalist wooden wall clocks can be attributed to a confluence of benefits:

    Aesthetic Versatility

    Minimalist designs effortlessly blend with a wide range of interior styles, from contemporary and modern to Scandinavian and farmhouse. Their neutral palette and simple lines complement bold accent colors, textured surfaces, and statement furniture, creating a harmonious and balanced aesthetic.

    Timeless Appeal

    Unlike trend-driven designs that quickly fade into obscurity, minimalist wooden wall clocks exude a timeless quality. Their simple forms and natural materials remain relevant across generations, ensuring that they remain a cherished part of your home décor for years to come.

    Enhanced Functionality

    Minimalist clocks prioritize clarity and readability. The absence of excessive ornamentation ensures that the time display remains the focal point, allowing for easy and accurate timekeeping.

    Environmental Sustainability

    Wood is a renewable and sustainable resource, making wooden wall clocks a more eco-conscious choice compared to clocks made from synthetic materials. By opting for clocks crafted from responsibly sourced wood, you can contribute to environmental conservation.

    Unique Character

    Each piece of wood possesses its own unique grain pattern and texture, making every wooden wall clock a one-of-a-kind work of art. This natural variation adds a touch of individuality and character to your home décor.

    Types of Minimalist Wooden Wall Clocks

    The world of minimalist wooden wall clocks offers a diverse range of styles to suit every taste and design preference:

    Geometric Clocks

    Geometric clocks feature clean lines, sharp angles, and simple shapes, creating a modern and contemporary aesthetic. They often incorporate materials such as metal or acrylic alongside wood, adding a touch of industrial chic.

    Circular Clocks

    Circular clocks embody a classic and timeless aesthetic. They can range from sleek and minimalist designs with a single hand to more intricate models with Roman numerals or Arabic numerals. The circular form creates a sense of balance and harmony within any space.

    Rustic Clocks

    Rustic wooden wall clocks evoke a sense of warmth and nostalgia. They often feature distressed wood finishes, natural knots, and simple, functional designs. These clocks add a touch of rustic charm to farmhouse, cottagecore, or bohemian decor.

    Scandinavian Clocks

    Scandinavian minimalist clocks are characterized by their clean lines, light wood tones, and functional simplicity. They often incorporate natural elements such as leather or metal accents, reflecting the minimalist Scandinavian design philosophy.

    Tips for Choosing the Perfect Minimalist Wooden Wall Clock

    Selecting the right minimalist wooden wall clock for your home involves considering several factors:

    Size and Scale

    The size of the clock should be proportionate to the wall space and overall room dimensions. A small clock may get lost in a large room, while a large clock may overwhelm a smaller space.

    Color and Finish

    Choose a clock color and finish that complements your existing décor. Lighter wood tones blend well with neutral palettes, while darker wood tones create a more dramatic statement.

    Clock Mechanism

    Consider the type of clock mechanism, whether it's quartz, silent sweep, or cuckoo. Quartz clocks are generally more accurate and quiet, while cuckoo clocks add a whimsical touch.

    Personal Style

    Ultimately, the best minimalist wooden wall clock is one that reflects your personal style and preferences. Explore different designs, materials, and finishes to find a clock that resonates with your aesthetic sensibilities.

    Conclusion

    Wooden wall clocks with minimalist designs have captured the hearts of shoppers seeking a harmonious blend of style, functionality, and sustainability. Their clean lines, natural warmth, and timeless appeal elevate any space, creating a serene and sophisticated ambiance. By carefully considering the factors outlined above, you can choose a minimalist wooden wall clock that complements your home décor and adds a touch of elegance and charm to your living environment.

    Tuesday, November 19, 2024

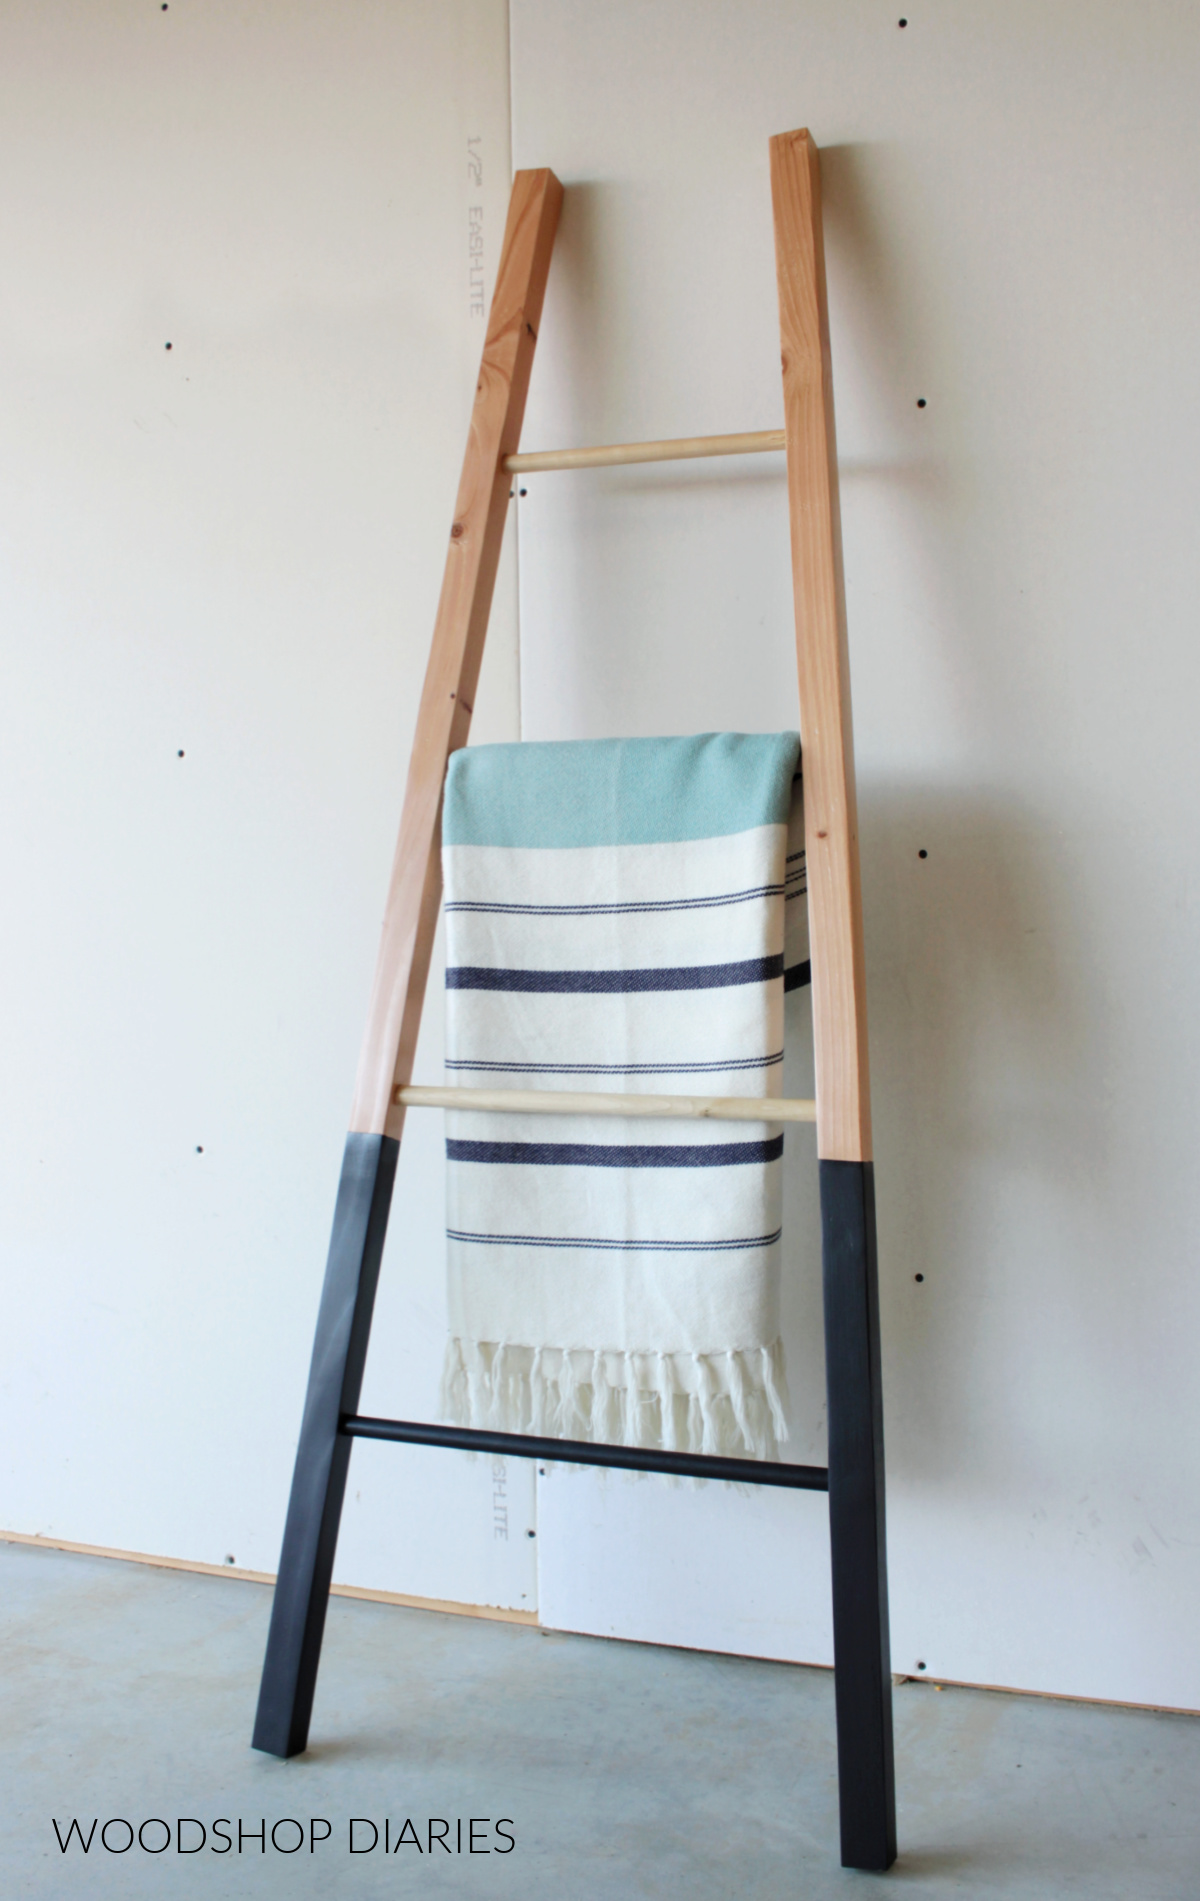
    DIY Multi-Use Blanket Ladders for Extra Storage and Style


    DIY Multi-Use Blanket Ladders for Extra Storage and Style

    DIY Multi-Use Blanket Ladders for Extra Storage and Style

    Hey there, fellow organization enthusiasts! Are you constantly battling with overflowing closets and struggling to find a stylish way to store your extra blankets and throws? Well, fret no more! Today we're diving into the world of DIY blanket ladders. Not only are they a practical way to keep your cozy essentials within easy reach, but they also add a touch of charm and rustic elegance to any room.

    Think about it. A blanket ladder is like a stylish and functional piece of furniture that can double as an eye-catching accent. It's a win-win, right? Plus, building your own blanket ladder gives you the freedom to customize it to perfectly match your decor and personal style.

    Why Choose a DIY Blanket Ladder?

    Beyond the obvious storage benefits, building your own blanket ladder offers some serious advantages:

    • Cost-Effective: You can create a stunning blanket ladder for a fraction of the price compared to buying one from a store.
    • Personalized Style: Choose the perfect wood, stain, and design to perfectly complement your home decor.
    • Sense of Accomplishment: Building something yourself is incredibly rewarding, and the pride you'll feel when you're done is priceless.
    • Great for Beginners: Don't be intimidated! This project is surprisingly easy, even if you're a DIY novice.

    Gathering Your Supplies: It's Time to Shop!

    Before you start building, make sure you have everything you need. Don't worry, this list isn't too long, and most of the supplies can be found at your local hardware store.

    Materials:

    • Wood:
      • Two pieces of 1x2 lumber (for the ladder rungs)
      • Two pieces of 1x4 lumber (for the ladder sides)
      • One piece of 1x6 lumber (for the top shelf)
    • Screws: 1 1/4-inch wood screws
    • Wood Glue
    • Wood Stain (optional, for a finished look)
    • Paint (optional, for a colorful touch)
    • Sandpaper (for smoothing edges)
    • Level (for ensuring your ladder is straight)
    • Measuring Tape
    • Pencil
    • Drill (with a drill bit that matches your screws)

    Step-by-Step Building Guide: Let's Get Crafting!

    Now that you've gathered your supplies, let's break down the building process into easy-to-follow steps. Don't worry, it's easier than you think!

    Step 1: Cut Your Lumber

    Using your measuring tape and a pencil, mark the lumber for cutting. For the ladder sides, you'll need two pieces that are the desired height of your ladder (for example, 60 inches). For the ladder rungs, cut pieces that are the desired width of your ladder (for example, 16 inches). Make sure to account for the thickness of the ladder sides when measuring for the rungs. You'll also want to cut the shelf to the desired width for your ladder.

    Now, carefully use a saw (hand saw, circular saw, or jigsaw â€" choose what you're most comfortable with) to cut your lumber to the marked lengths. Remember to wear safety glasses during cutting!

    Step 2: Sanding and Staining (Optional)

    Before assembling, you'll want to smooth out any rough edges by sanding your cut pieces with sandpaper. Start with a rough grit sandpaper (like 80 grit) to remove any imperfections, then gradually move to finer grits (like 120 or 220 grit) for a smoother finish.

    If you're going for a stained look, now is the time to apply your chosen wood stain. Let the stain dry completely before moving on to the next step.

    Step 3: Assembling the Ladder Sides

    Lay your two ladder side pieces down, parallel to each other. Now, place your ladder rungs between the sides. Make sure the rungs are evenly spaced, using your measuring tape to check.

    Use wood glue to secure each rung to the ladder sides. Make sure to apply a generous amount of glue along the edges where the rungs meet the sides. Then, secure the rungs with screws. For extra stability, drill pilot holes slightly smaller than the screw size to prevent splitting the wood.

    Step 4: Attaching the Top Shelf

    Now, place the top shelf on top of the ladder. Position it so that it's centered and securely attached to the ladder sides. Use wood glue and screws to attach the shelf, just like you did with the rungs.

    Step 5: Finishing Touches

    Once the ladder is assembled, it's time to make it look fantastic! If you chose to paint your ladder, now is the time to add your color. Let the paint dry completely before adding any additional finishing touches.

    Step 6: Enjoy!

    Congratulations, you just created your very own DIY blanket ladder! Now, find the perfect spot in your bedroom, living room, or any other space where you want to add some cozy storage and stylish charm. Hang your favorite blankets and throws, and admire your handiwork.

    Creative Ways to Style Your Blanket Ladder

    The beauty of DIY blanket ladders is that they're incredibly versatile! Here are some creative ideas for styling your new creation:

    • Throws and Blankets: The classic use, of course! Hang your cozy blankets and throws in a variety of colors and textures for a visually appealing and practical solution.
    • Towels and Washcloths: In a bathroom, a blanket ladder can become a stylish towel rack.
    • Plants and Vases: Add a touch of greenery by displaying potted plants or vases on the shelf and hanging decorative garlands or vines from the rungs.
    • Scarves and Jewelry: In a bedroom, use the ladder to showcase your favorite scarves, jewelry, or hats.
    • Decorative Items: Let your creativity run wild! Display framed photos, vintage books, artwork, or other small decorative items.

    Commonly Asked Questions

    Here are some common questions that you might have about DIY blanket ladders.

    Q: What kind of wood should I use for my blanket ladder?

    The best wood choice really depends on your personal preference and style. Some popular options include pine (affordable and easy to work with), oak (strong and durable), maple (beautiful grain pattern), and cedar (natural scent and resistance to insects).

    Q: How do I make sure my ladder is sturdy?

    Use high-quality wood, make sure your cuts are precise, and use plenty of wood glue and screws. You can also add additional support to the ladder by adding diagonal braces or using thicker lumber.

    Q: Can I paint my ladder?

    Absolutely! Paint is a fantastic way to personalize your ladder and make it match your decor. Choose a color that complements your furniture and walls.

    Q: Where should I place my blanket ladder?

    The placement depends on where you're storing your blankets or other items. A bedroom wall, living room corner, or even a bathroom wall are all excellent options.

    There you have it â€" a comprehensive guide to building your own DIY blanket ladder! You're now equipped with the knowledge and confidence to create a beautiful and functional storage solution for your home. Get ready to impress your friends and family with your creativity and handy skills. Happy crafting!

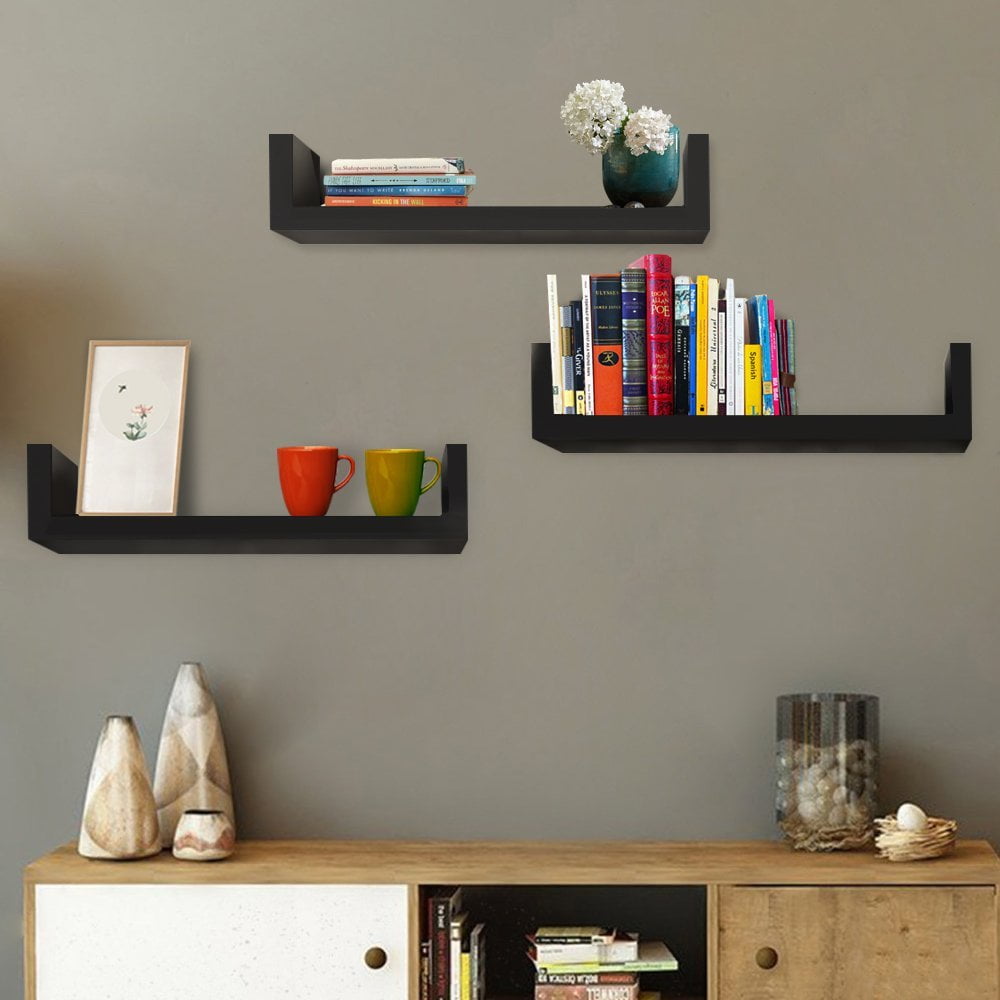
    Rustic Floating Shelves Ideas for a Cozy, Warm Vibe


    Rustic Floating Shelves Ideas for a Cozy, Warm Vibe

    Rustic Floating Shelves: Adding Cozy Warmth to Your Home

    Hey there, fellow home decor enthusiast! Are you looking to add some rustic charm and warmth to your space? Floating shelves are a fantastic way to do just that, and they can be super versatile too! Let's dive into the world of rustic floating shelves, exploring why they're so awesome and how you can make them work for your home.

    Why Rustic Floating Shelves Rock

    Rustic floating shelves are like a hug for your walls, adding a touch of natural beauty and a comforting feel. They're all about that cozy, lived-in vibe that makes a house feel like a home. And the best part? They're super easy to install and incredibly adaptable. Let's break down why they're so cool:

    Visual Appeal

    Rustic floating shelves have a unique ability to blend seamlessly with different styles, whether you're into farmhouse chic, modern industrial, or even a touch of bohemian. The natural textures and colors of wood instantly add warmth and character, making your space feel more inviting and homey.

    Space-Saving Wonders

    Okay, so let's be honest, we all have those little nooks and crannies that can be tricky to utilize. Floating shelves come to the rescue! They're perfect for maximizing vertical space, giving you more room to showcase your favorite things and keep things organized.

    Easy to Customize

    The beauty of rustic floating shelves is that you can really personalize them! You can choose different wood types, stain colors, and even add unique finishes to match your style and personality.

    Choosing the Perfect Rustic Floating Shelves

    Now, let's talk about the fun part - picking the right rustic floating shelves! Here are some key things to consider:

    Wood Type

    There's a whole world of wood options out there! Here are some popular choices for a rustic look:

    • Reclaimed wood: This is a fantastic way to add a touch of history and character to your shelves. It's often rich in color and texture, making it perfect for that rustic vibe.
    • Pine: This is a classic choice known for its soft texture and natural knots. It's often affordable and easy to work with.
    • Walnut: This wood is a bit more luxurious, known for its rich, dark color and stunning grain patterns.
    • Oak: This sturdy wood is known for its durability and beautiful grain. It can be a bit pricier, but it will last you a long time.

    Size and Shape

    Think about the space where you're planning to put the shelves. Do you need long, narrow shelves or short, wide ones? Also, consider the items you'll be displaying on them. You want to choose shelves that are the right size to showcase your treasures without looking crowded.

    Finish

    A little bit of finish can go a long way in creating the perfect rustic look. Consider these options:

    • Natural wood finish: Embrace the natural beauty of the wood by leaving it untreated. This is perfect for a rustic look.
    • Stained finish: Stain can enhance the wood's natural color and bring out the grain patterns. Popular choices for a rustic look include dark brown, walnut, or red mahogany stains.
    • Whitewash finish: Whitewash creates a soft, weathered look that's perfect for adding a touch of farmhouse charm.

    Installation

    Don't worry, installing rustic floating shelves isn't rocket science! Most shelves come with a simple bracket system that allows you to attach them directly to your walls. You'll need to use a stud finder to locate the wall studs for secure support, especially if you're putting heavy things on your shelves.

    Rustic Floating Shelves: Styling Ideas

    The possibilities are endless when it comes to styling your rustic floating shelves! Here are some ideas to spark your imagination:

    Books and Magazines

    Classic books and magazines always look charming on rustic shelves. Create a cozy reading nook by stacking up your favorite reads.

    Plants and Greenery

    Add a touch of life and freshness with plants! Choose small succulents, herbs, or even faux greenery for a natural feel.

    Family Photos and Artwork

    Showcase your favorite memories and art pieces on your shelves. You can use frames, canvases, or even just clip your photos and artwork to make a unique display.

    Decorative Objects

    Add personality to your shelves with decorative objects like vintage candlesticks, antique jars, or handmade pottery. Don't be afraid to mix and match different textures and colors.

    Practical Storage Solutions

    Beyond the aesthetics, rustic floating shelves can be practical too! Use baskets, boxes, or trays to organize small items like keys, mail, or craft supplies.

    Commonly Asked Questions

    Here are some common questions people have about rustic floating shelves:

    What are rustic floating shelves made of?

    Most rustic floating shelves are made of wood. However, some may be made of metal, reclaimed materials, or even a combination of materials to create unique designs.

    How do I install rustic floating shelves?

    The installation process varies depending on the type of shelf and the installation method. But generally, it involves using brackets, screws, and wall anchors to securely attach the shelves to the wall.

    Where can I find rustic floating shelves?

    You can find rustic floating shelves at a variety of places, including home improvement stores, furniture stores, and online retailers. You can also create your own shelves using reclaimed wood or other DIY materials.

    How do I style rustic floating shelves?

    When styling rustic floating shelves, focus on creating a cohesive and inviting look. Use natural elements, neutral colors, and textures to complement the rustic aesthetic. Consider showcasing your favorite items, like plants, books, photos, or decorative objects, to personalize your shelves.

    And there you have it! Rustic floating shelves are a simple yet effective way to infuse your home with warmth and character. Remember, the most important thing is to choose styles and materials that speak to you and make your space feel like a true reflection of yourself. Happy decorating!

    Monday, November 18, 2024

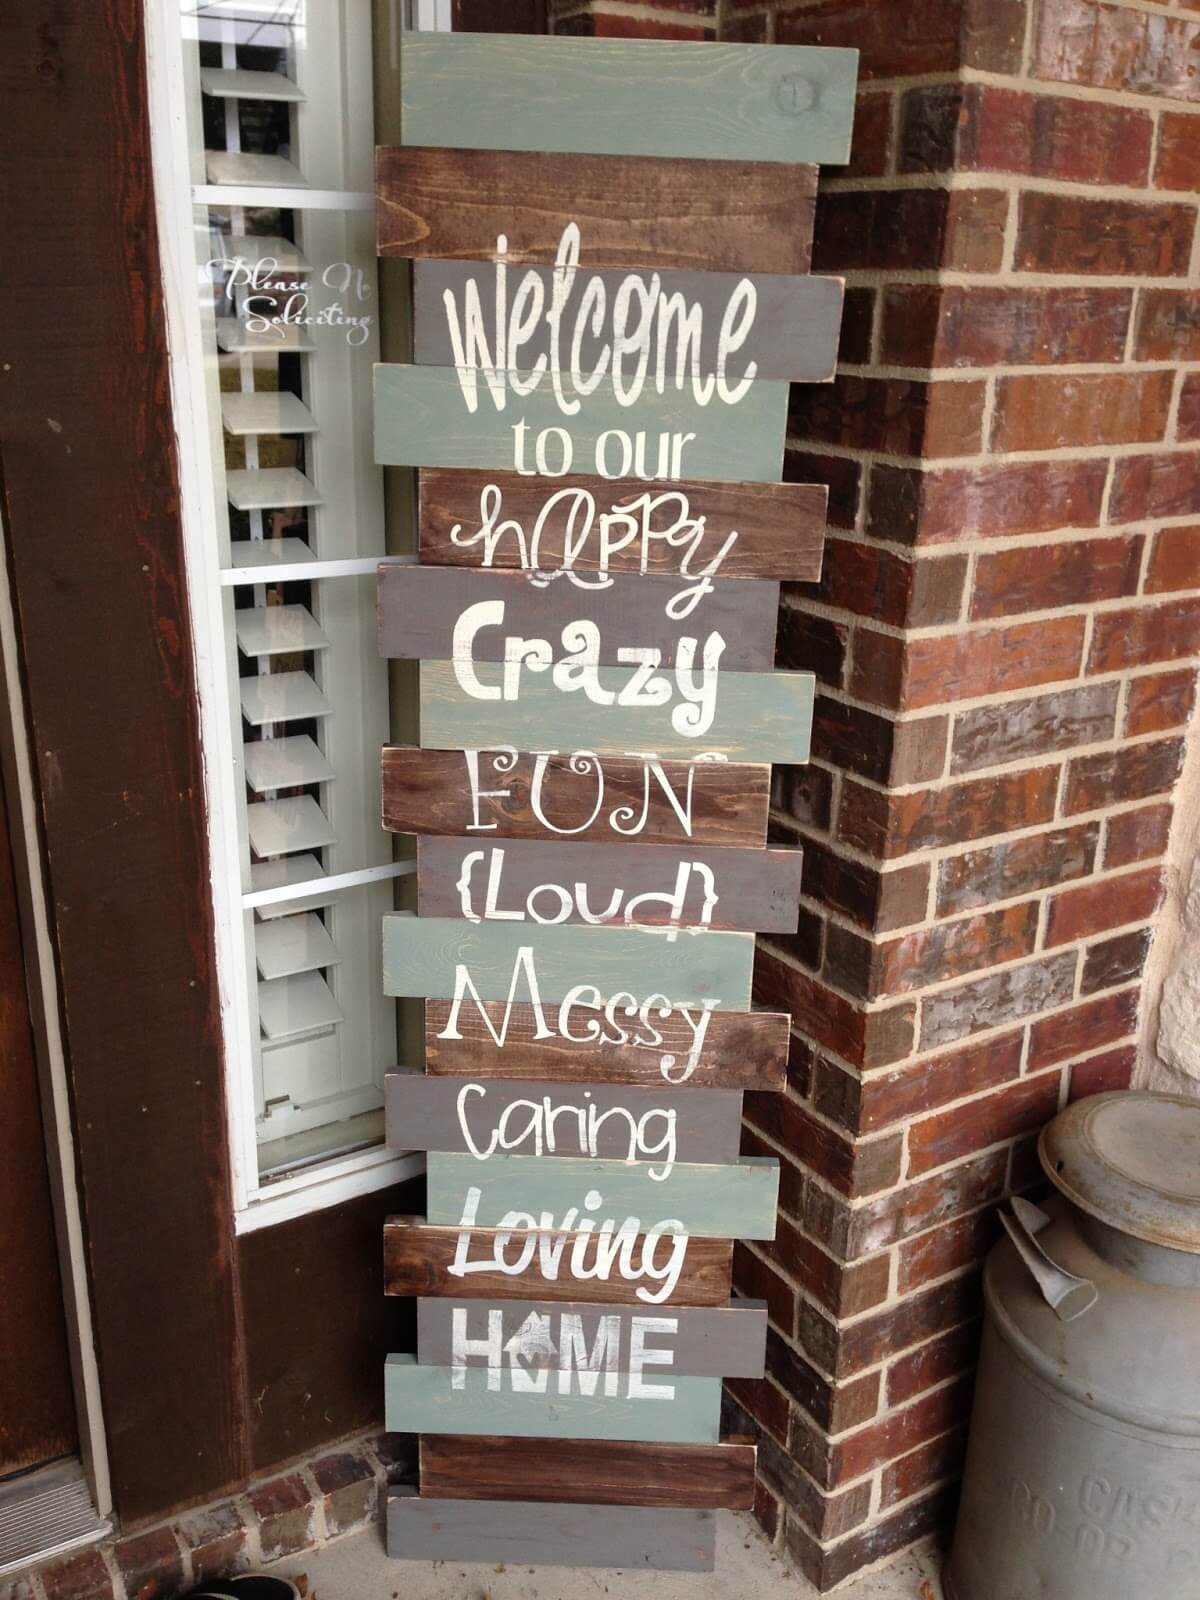
    DIY Welcome Signs for the Home That Sell Well


    DIY Welcome Signs for the Home That Sell Well

    DIY Welcome Signs for the Home That Sell Well

    Creating a welcoming and inviting ambiance at your home is a key factor in boosting curb appeal. A well-crafted DIY welcome sign can elevate your home's charm and add a personalized touch. But beyond aesthetics, these signs can also be a lucrative endeavor. With a touch of creativity and a keen eye for design, you can craft welcome signs that not only enhance your home but also attract potential buyers, generating a good return on investment.

    Key Factors for Success

    Before you pick up your paintbrush or hammer, consider these key factors that can make your DIY welcome signs a success:

    Target Audience

    Think about who you're trying to reach with your signs. Are you targeting families, young professionals, or a specific style aesthetic? Understanding your audience will help you determine the appropriate colors, fonts, and themes.

    Materials and Style

    Experiment with different materials like wood, metal, or reclaimed items to create unique and eye-catching signs. Consider the style of your home and neighborhood when choosing materials and design elements. A rustic sign might be perfect for a farmhouse, while a modern sign with clean lines might be ideal for a contemporary home.

    Personalization

    Personalized touches add a special element to your signs. Consider incorporating your home's address, a family name, or a meaningful quote that reflects your personality.

    Trending Welcome Sign Ideas

    Here are some popular welcome sign ideas that often resonate with potential buyers:

    Rustic Charm

    Embrace the warmth and natural beauty of wood with a rustic welcome sign. Use reclaimed barn wood or distressed planks for a vintage feel. Add touches of rustic charm with elements like twine, metal accents, and greenery.

    Modern Minimalism

    For a sleek and contemporary look, create a welcome sign using clean lines, geometric shapes, and bold typography. Metal, acrylic, or even painted canvas can be used for a modern aesthetic.

    Seasonal Flair

    Embrace the changing seasons with themed welcome signs. Use fall colors, wintery landscapes, or spring blooms to create a welcoming atmosphere. These signs can be rotated seasonally to keep your curb appeal fresh.

    Tips for Crafting a Winning Welcome Sign

    Now that you have some inspiration, let's dive into the practical tips for crafting a DIY welcome sign that sells:

    • Use High-Quality Materials: Invest in durable materials that will withstand the elements and last for years. This demonstrates attention to detail and quality craftsmanship.
    • Keep It Concise: A short and sweet message is more impactful than a long, rambling one. Stick to simple greetings like "Welcome Home" or "Our Happy Place."
    • Choose a Readable Font: Select a font that is easy to read from a distance and complements the overall style of your sign.
    • Pay Attention to Color: Choose colors that are inviting and complement your home's exterior. Consider using contrasting colors for a bold statement.
    • Add Visual Interest: Incorporate elements like decorative hardware, stencils, or even hand-painted details to add personality and dimension to your sign.

    Selling Your DIY Welcome Signs

    If you're looking to turn your crafting skills into a side hustle, here are some ways to sell your DIY welcome signs:

    • Online Marketplaces: List your signs on platforms like Etsy, Facebook Marketplace, or Craigslist.
    • Local Craft Shows: Showcase your signs at craft fairs and farmers markets. This allows you to interact with potential customers and gain valuable feedback.
    • Social Media: Use Instagram, Pinterest, and Facebook to promote your signs and build a following.
    • Partner with Local Businesses: Collaborate with home décor stores, gift shops, or real estate agents to sell your signs through their channels.

    With a little creativity and effort, you can craft DIY welcome signs that not only enhance your home's charm but also become a profitable venture. Remember to focus on quality materials, a thoughtful design, and a personal touch to create signs that resonate with potential buyers and add a warm welcome to every doorstep.

    Wednesday, November 13, 2024

    Floating Shelf Ideas for Small Spaces: DIY Projects You Can Tackle


    Floating Shelf Ideas for Small Spaces: DIY Projects You Can Tackle

    Floating Shelf Ideas for Small Spaces: DIY Projects You Can Tackle

    In the realm of interior design, maximizing space is paramount, especially for those dwelling in compact abodes. Floating shelves, with their minimalist aesthetic and space-saving prowess, offer a compelling solution. These ingenious structures seamlessly integrate into any decor, providing a versatile platform for showcasing cherished possessions, displaying decorative accents, or simply creating functional storage solutions.

    This guide delves into the realm of DIY floating shelves, empowering you to craft these stylish fixtures with minimal effort and expense. Whether you're a seasoned DIY enthusiast or a novice eager to embark on your first woodworking project, the instructions provided will guide you through each step, from selecting materials to installing the finished product.

    The Appeal of Floating Shelves

    Floating shelves hold an undeniable allure, emanating an air of modern sophistication that complements a wide range of interior styles. Their sleek, minimalist design eliminates the visual clutter of traditional shelving units, creating an illusion of spaciousness that belies the actual footprint.

    Beyond their aesthetic appeal, floating shelves offer a multitude of practical advantages, particularly in small spaces. Their wall-mounted configuration liberates valuable floor space, allowing for more flexible furniture arrangement and maximizing the overall sense of openness.

    DIY Floating Shelves: Unleashing Your Creativity

    Embarking on a DIY floating shelf project is an engaging and rewarding endeavor that empowers you to customize the final product to your exact specifications. From selecting materials to determining the shelf's dimensions, you have complete control over the design, ensuring it perfectly complements your existing décor and personal style.

    Materials and Tools for Success

    Before diving into the construction process, gather the necessary materials and tools, ensuring a smooth and enjoyable experience.

    • Wood: Pine, maple, oak, and walnut are popular choices for floating shelves. Consider the aesthetic and durability requirements of your project.
    • Brackets: These sturdy metal fixtures provide the necessary support for the shelves. Opt for brackets specifically designed for floating shelves, ensuring secure and concealed installation.
    • Screws: Use screws of appropriate length and strength, ensuring a secure connection between the brackets and the wall.
    • Wood Glue: Use a high-quality wood glue to reinforce the joints between the shelf and the brackets.
    • Measuring Tape: Essential for determining the accurate dimensions of your shelves.
    • Level: Ensure that your shelves are installed perfectly level and aesthetically pleasing.
    • Saw: A handsaw, jigsaw, or circular saw will be required to cut the wood to your desired size.
    • Drill: Use a drill to create pilot holes for the screws, preventing wood splitting.
    • Sandpaper: Smooth any rough edges on the wood with sandpaper.
    • Finishing Touches: Choose a stain or paint to enhance the appearance of your shelves, complementing your existing décor.

    Step-by-Step Guide to Building Floating Shelves

    Now that you have gathered the necessary materials and tools, follow these instructions for constructing your floating shelves:

    1. Determine the Shelf Dimensions: Measure the desired width, depth, and number of shelves. Consider the weight of the items you plan to display and ensure that the shelves are sturdy enough to support the load.
    2. Cut the Wood: Using your saw of choice, carefully cut the wood to the dimensions determined in the previous step. Ensure clean, straight cuts for a professional finish.
    3. Sand the Edges: Use sandpaper to smooth any rough edges on the cut wood, preventing splinters and enhancing the overall aesthetic.
    4. Choose and Install Brackets: Select brackets that are appropriate for the weight of the shelves and the type of wall material. Install the brackets securely to the wall using screws and a level, ensuring that they are perfectly horizontal and level with one another. Refer to the manufacturer's instructions for specific installation details.
    5. Attach the Shelves to Brackets: Apply wood glue to the underside of the shelf boards where they will contact the brackets. Position the shelves onto the brackets, ensuring that they are centered and flush with the wall. Secure the shelves to the brackets using screws, driving them through the pre-drilled holes.
    6. Finishing Touches: Once the shelves are installed, apply a stain or paint to enhance their appearance and complement your existing décor. Allow the finish to dry completely before loading the shelves with your treasured possessions or decorative accents.

    Creative Ideas for Floating Shelves

    The beauty of DIY floating shelves lies in their versatility, allowing you to unleash your creativity and personalize them to your unique taste and preferences. Explore these inspiring ideas to unlock the full potential of these space-saving fixtures:

    Showcase Your Style

    • Bookshelves: Create a stunning literary haven by showcasing your favorite novels, biographies, or cookbooks. Use different shelf sizes to create visual interest and highlight specific titles.
    • Photo Gallery: Display cherished memories with a curated collection of framed photographs, art prints, or postcards. Use floating shelves to create a cohesive and captivating visual narrative.
    • Plant Display: Transform your space into a verdant oasis with a display of lush foliage. Arrange plants in various sizes and shapes, creating a cascading effect that brings a touch of nature indoors.
    • Kitchen Essentials: Optimize kitchen space with floating shelves for storing spices, herbs, cookbooks, or decorative accents. Utilize shelf dividers to create compartments for organization.
    • Bathroom Storage: Free up valuable counter space in the bathroom by installing floating shelves for storing toiletries, towels, or decorative elements.
    • Entryway Solutions: Enhance the functionality of your entryway with floating shelves to store keys, mail, or decorative items. Choose a rustic or modern style to complement your entryway decor.

    Think Beyond the Ordinary

    Break free from traditional design conventions and explore these innovative floating shelf ideas:

    • Corner Shelves: Utilize those often overlooked corner spaces with custom-designed corner shelves. Enhance functionality and maximize space in any room.
    • Backlit Shelves: Create a captivating display with integrated LED lighting. Illuminate books, photographs, or decorative accents, adding a touch of drama and sophistication.
    • Floating Desk: Combine a floating shelf with a sleek, minimalist desk surface, creating a compact yet functional workspace.
    • Floating Bedside Table: Replace bulky bedside tables with floating shelves, adding a touch of modern elegance to your bedroom while freeing up valuable floor space.
    • Floating Storage Bench: Craft a multi-functional piece of furniture by incorporating a storage bench design into your floating shelves. This ingenious solution adds seating, storage, and a touch of style to your space.

    Conclusion

    Floating shelves are a versatile and stylish solution for enhancing the aesthetics and functionality of small spaces. Their minimalist design seamlessly integrates into any décor, while their space-saving prowess creates an illusion of openness and maximizes the overall sense of spaciousness.

    Embark on a DIY floating shelf project to unleash your creativity and personalize these structures to your unique taste and preferences. From selecting materials and determining dimensions to applying finishing touches, you have complete control over the design process. Embrace the rewarding experience of crafting custom shelves that not only enhance your home but also reflect your unique personality and style.

    Table Chess Designs That Will Appeal to Chess Lovers and Buyers


    Table Chess Designs That Will Appeal to Chess Lovers and Buyers

    Table Chess Designs That Will Appeal to Chess Lovers and Buyers

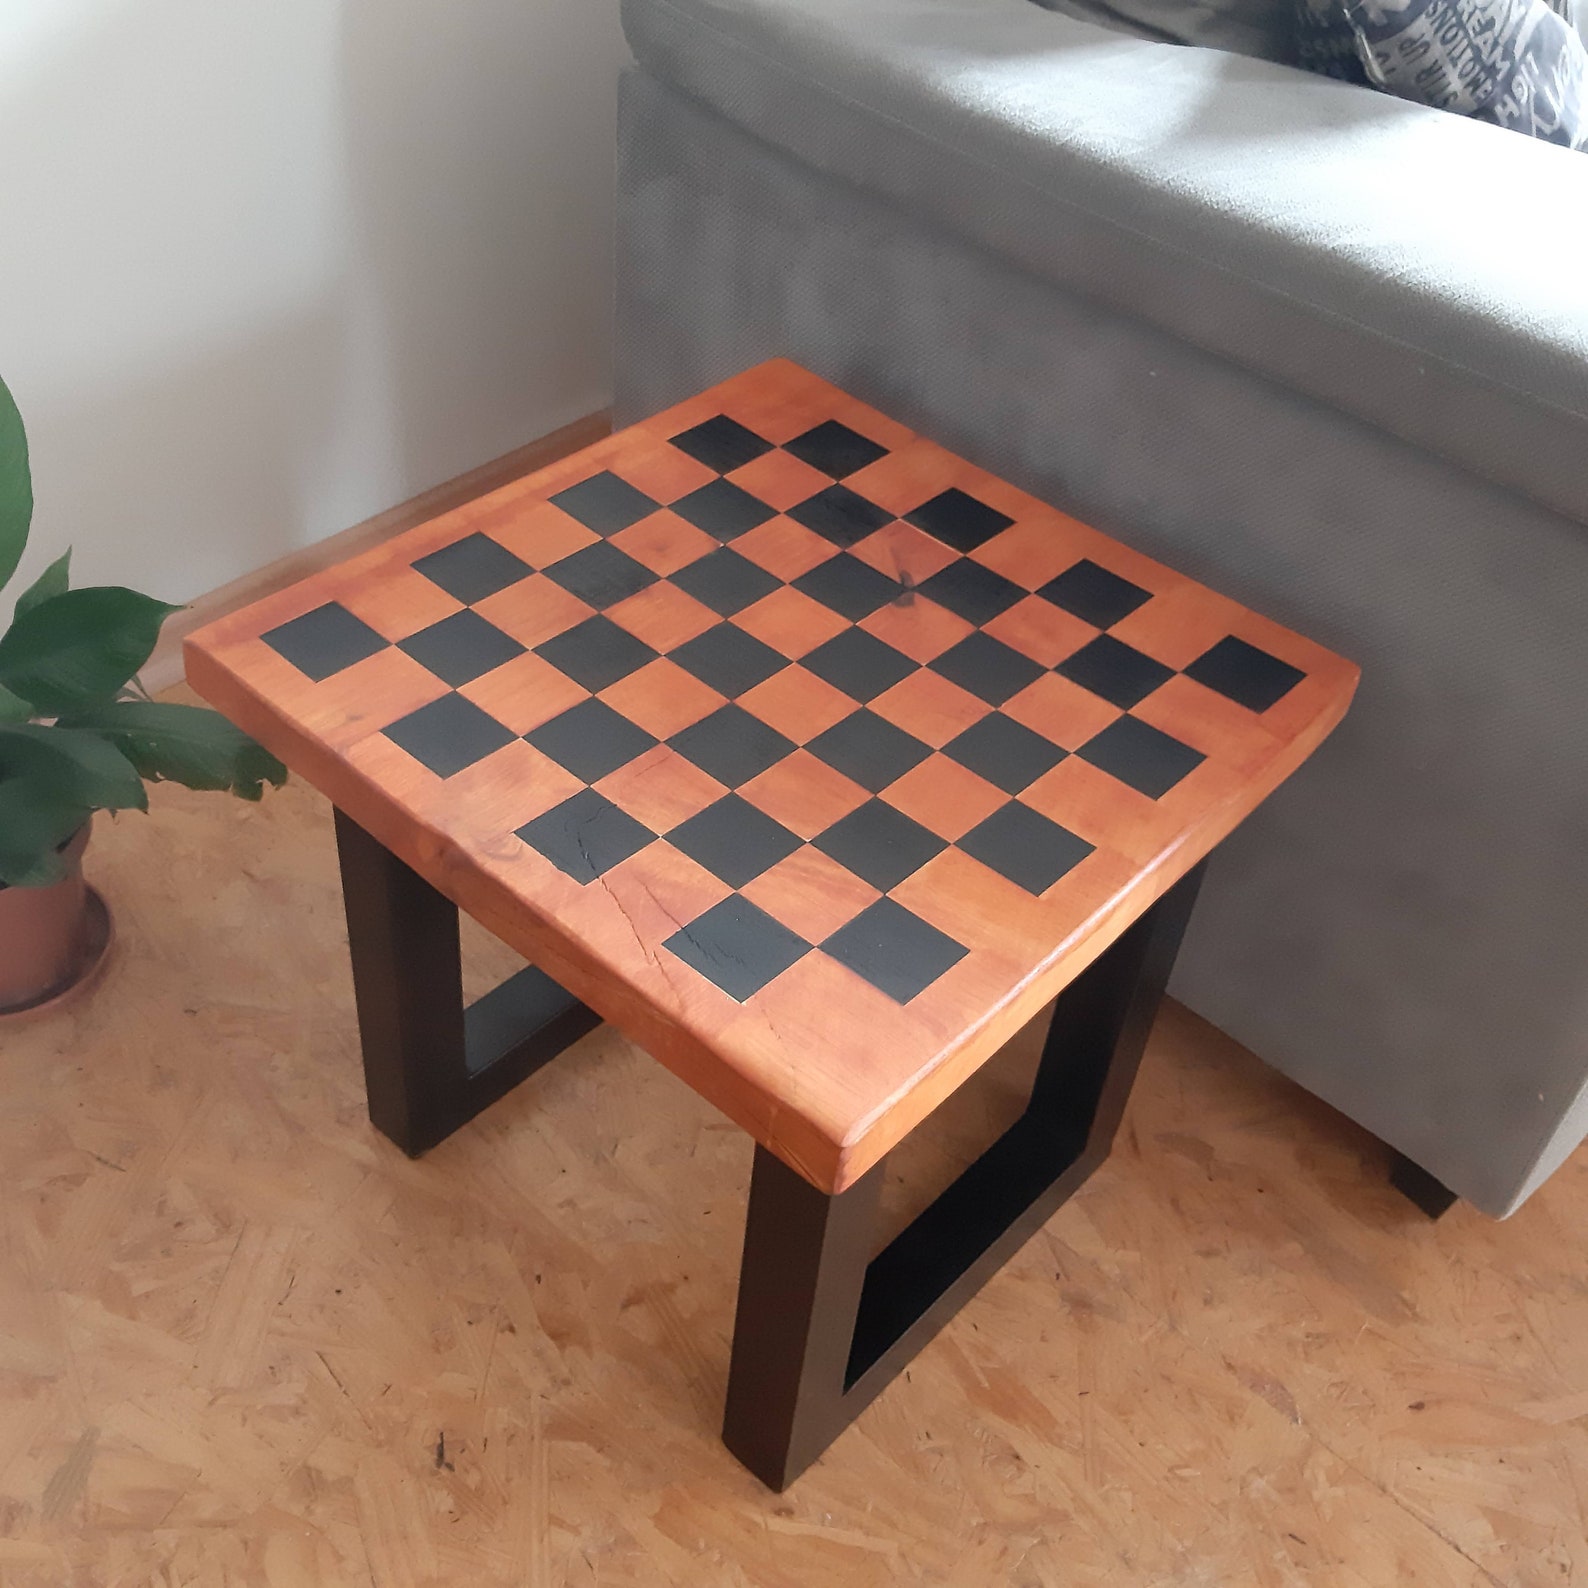
    Chess, the timeless game of strategy and intellect, has captivated minds for centuries. But beyond its classic gameplay, a chess set can be a beautiful and cherished piece of art, reflecting its owner's personality and passion. When choosing a chess table, discerning buyers seek more than just functionality; they desire a design that elevates their playing experience and enhances their home décor. This article explores the table chess designs that captivate chess enthusiasts and appeal to buyers seeking style, craftsmanship, and unique character.

    Modern Minimalism: Clean Lines and Contemporary Elegance

    For those who value simplicity and understated elegance, modern minimalist chess tables are a perfect choice. These tables often feature clean lines, sleek surfaces, and a neutral color palette. They seamlessly integrate into modern interiors, creating a sophisticated and serene atmosphere.

    Key Design Elements:

    • Geometric Shapes: Squares, rectangles, and circles create a sense of order and balance.
    • Metallic Finishes: Silver, gold, or black accents add a touch of luxury and sophistication.
    • Glass Tops: Transparent glass surfaces enhance the sleekness of the design, showcasing the intricate details of the chess pieces.

    Classic Elegance: Timeless Designs for a Touch of History

    Classic chess tables evoke a sense of tradition and sophistication. Drawing inspiration from historical designs, these tables often feature intricate carvings, rich wood finishes, and elegant accents.

    Key Design Elements:

    • Intricate Carvings: Detailed carvings on the table legs, borders, or even the chessboard itself add a touch of artistry and sophistication.
    • Dark Wood Finishes: Mahogany, walnut, or rosewood provide a warm and classic aesthetic.
    • Brass Accents: Brass hardware, inlays, or chess pieces add a touch of warmth and a timeless appeal.

    Whimsical and Unique: Breaking the Mold with Creative Designs

    For those who embrace individuality and creativity, whimsical chess tables offer a refreshing departure from traditional designs. These tables break the mold with unique shapes, bold colors, and unexpected materials.

    Key Design Elements:

    • Abstract Shapes: Organic curves, geometric patterns, or unconventional forms create a visually captivating statement.
    • Bold Colors: Vibrant hues and contrasting accents add a playful and eye-catching element.
    • Unconventional Materials: Glass, metal, stone, or even recycled materials can add a unique touch to the table.

    Personalized Choices: Creating a Table as Unique as You Are

    The beauty of chess tables lies in their versatility. Buyers can personalize their tables to reflect their individual taste and style.

    Customization Options:

    • Custom Dimensions: Ensure a perfect fit for your playing space.
    • Personalized Engraving: Add your initials, a special date, or a meaningful quote.
    • Customizable Chess Pieces: Choose from a vast array of materials, styles, and themes to personalize your game.

    Whether you prefer the clean lines of modern minimalism, the timeless elegance of classic designs, or the whimsy of creative expressions, the perfect table chess design awaits. Embrace your individuality, elevate your playing experience, and create a piece of art that will be cherished for generations to come.

    Inspiring Woodworking Gift Projects: Unleash Your Creativity


    Inspiring Woodworking Gift Projects: Unleash Your Creativity

    Inspiring Woodworking Gift Projects: Unleash Your Creativity

    In a world filled with mass-produced goods, handcrafted gifts hold a special place. Woodworking, a timeless art, offers the perfect avenue to create unique and meaningful presents for loved ones. From practical pieces to decorative accents, woodworking gift projects provide a tangible expression of care and creativity.

    Whether you are a seasoned woodworker or just starting out, this guide will inspire you with a range of projects that are both rewarding to make and cherished to receive.

    Practical and Useful Woodworking Gifts

    These woodworking projects serve a purpose while showcasing your craftsmanship. They are perfect for those who appreciate functional and durable items.

    Cutting Board

    A cutting board is a staple in any kitchen, and a handcrafted one is a welcome addition. Choose a beautiful hardwood like maple or cherry for a durable and elegant surface. Consider adding a juice groove to prevent spills and a personalized inscription for a thoughtful touch.

    Serving Tray

    A serving tray is a versatile piece for entertaining, serving breakfast in bed, or simply adding a touch of charm to the coffee table. Opt for a sturdy wood like walnut or oak and incorporate decorative elements like handles, inlays, or a painted finish.

    Wooden Utensil Holder

    Keep kitchen utensils organized and within reach with a handcrafted utensil holder. A simple design with a few compartments works well, or you can get creative with different shapes and sizes. Choose a wood that complements the kitchen décor, like bamboo or cherry.

    Jewelry Box

    A jewelry box is a thoughtful gift for any woman. Choose a small piece of wood, like walnut or cedar, and design a box with compartments and drawers for different jewelry items. Add a lining for a luxurious feel and personalize it with a name or inscription.

    Wooden Picture Frame

    Showcase cherished memories with a handcrafted picture frame. Choose a wood that complements the photograph, like mahogany for a classic look or birch for a rustic touch. Experiment with different shapes and sizes to create a unique frame.

    Decorative and Stylish Woodworking Gifts

    These woodworking projects are all about adding beauty and character to a home. They make wonderful gifts for those who appreciate unique and artistic pieces.

    Wooden Wall Clock

    A wooden wall clock is a timeless and practical piece of home décor. Choose a wood with a beautiful grain pattern, like walnut or oak. Experiment with different clock mechanisms and personalize the clock with a unique design.

    Wooden Wall Art

    From abstract designs to intricate geometric patterns, wooden wall art allows you to express your creativity. Experiment with different woods and textures to create a piece that complements the recipient's décor.

    Wooden Ornaments

    Handcrafted wooden ornaments add a personal touch to any Christmas tree. Choose a wood like pine or birch and carve out simple shapes like stars, snowflakes, or birds. Paint them with festive colors or leave them natural for a rustic look.

    Wooden Coasters

    Protect furniture and add a touch of elegance with handcrafted wooden coasters. Choose a durable wood like maple or cherry and cut out simple shapes like circles, squares, or geometric patterns. Consider adding a decorative element like a mosaic inlay or a laser-engraved design.

    Wooden Birdhouse

    Attract feathered friends to the garden with a handcrafted birdhouse. Choose a wood that is resistant to weather and insects, like cedar or redwood. Design a birdhouse with multiple compartments and a decorative roof to add visual interest.

    Tips for Creating Unique and Meaningful Woodworking Gifts

    Here are some tips to ensure your woodworking gift projects are not only beautiful but also truly special:

    • Consider the recipient's taste and style. Choose a project that suits their preferences and décor.
    • Use high-quality materials. Invest in durable woods that will stand the test of time.
    • Pay attention to detail. Take pride in your craftsmanship and ensure a smooth and polished finish.
    • Add a personal touch. Incorporate a name, date, or special message for a unique and meaningful gift.
    • Present your gift thoughtfully. Wrap it in beautiful paper and add a handwritten card expressing your appreciation.

    Beyond the Woodshop: Exploring Additional Gift Ideas

    While woodworking projects offer a tangible and creative approach to gifting, there are other avenues to consider:

    • Personalized Wooden Boxes: Create custom-made boxes for storing valuables, tools, or other treasured items.
    • Wooden Signs and Plaques: Design unique signs for homes, gardens, or businesses with personalized messages or decorative elements.
    • Wooden Toys: Craft educational and engaging toys for children using natural and safe materials.
    • Wooden Candlesticks and Holders: Create elegant and functional candle holders to enhance any space.
    • Wooden Jewelry: Design and craft unique wooden bracelets, necklaces, and earrings for a personalized touch.

    Conclusion: Unleashing Creativity and Bringing Joy

    Woodworking offers a rewarding and creative outlet for crafting unique and meaningful gifts. From practical pieces to decorative accents, these projects provide a tangible expression of care and appreciation. Whether you are a seasoned woodworker or just starting out, let your creativity flourish and create gifts that bring joy to those you cherish.

    Beginner Woodworking Projects to Decorate Your Home


    Beginner Woodworking Projects to Decorate Your Home

    Beginner Woodworking Projects to Decorate Your Home

    Hey there, woodworking enthusiast! Ready to transform your home with your own handcrafted creations? You don't need to be a seasoned pro to create beautiful and functional pieces. In fact, woodworking is a fantastic hobby for beginners, offering a sense of accomplishment and a unique way to personalize your space.

    Today, we're going to dive into some beginner-friendly woodworking projects that are perfect for sprucing up your home. These projects are designed to be easy to follow, requiring basic tools and materials that you can find at most hardware stores. So grab your hammer, saw, and a sprinkle of creativity, and let's get started!

    Simple and Stylish Shelves

    Floating shelves are a fantastic way to add storage and visual interest to your walls. They're super versatile and can be used in any room, from your living room to your kitchen or even your bathroom. The best part? They're surprisingly easy to make!

    What You'll Need:

    • Wood boards (pine, oak, or maple work well)
    • Wood stain or paint (optional)
    • Screws
    • Measuring tape
    • Level
    • Drill
    • Saw (circular saw or jigsaw)
    • Sandpaper

    Let's Build:

    1. Measure and cut: Determine the size and number of shelves you need. Use your saw to cut the boards to the desired length and width.
    2. Sand the edges: Smooth out any rough edges with sandpaper. This will ensure a clean and polished look.
    3. Apply stain or paint (optional): If you want to add color or a unique finish, apply stain or paint to the shelves. Let it dry completely before moving on.
    4. Mark and drill mounting holes: Use a pencil to mark the location of the mounting brackets on the wall. Drill pilot holes at the marked locations to make installing the screws easier.
    5. Install the mounting brackets: Secure the brackets to the wall using screws. Make sure they are level and securely attached.
    6. Slide the shelves onto the brackets: Carefully slide the shelves onto the brackets, ensuring they are level and stable.

    Voilà! Your shelves are ready to display your favorite books, plants, or decorative items. Remember, you can personalize these shelves with different sizes, shapes, and finishes to suit your style.

    Rustic Wooden Coasters

    Who doesn't love a good set of coasters? They protect your furniture from unsightly rings and add a touch of personality to your coffee table. This project is a great way to utilize leftover wood scraps or even repurposed materials.

    What You'll Need:

    • Small pieces of wood (approximately 4 inches in diameter)
    • Sandpaper
    • Wood glue (optional)
    • Felt pads
    • Wood stain or paint (optional)

    Let's Build:

    1. Cut and sand: Cut your wood pieces into circles using a jigsaw or a coping saw. Sand the edges and surfaces smooth to ensure a comfortable feel.
    2. Apply wood glue (optional): If you're using thin pieces of wood, you can add extra stability by applying wood glue to the underside of each coaster before attaching the felt pads.
    3. Attach the felt pads: Apply a small amount of wood glue or a strong adhesive to the back of each felt pad and press it onto the underside of the coaster. Make sure the pads are centered.
    4. Stain or paint (optional): Add a personal touch by staining or painting your coasters. Allow the finish to dry completely before using them.

    Your rustic coasters are ready to add a touch of warmth and charm to your coffee table or bar. Experiment with different wood types and finishes to create a unique set that reflects your style.

    Easy-to-Make Wooden Wall Decor

    Transform plain walls into stunning focal points with simple wooden wall art. You can create abstract designs, geometric patterns, or even personalized messages for a truly unique touch.

    What You'll Need:

    • Wood pieces (various sizes and shapes)
    • Sandpaper
    • Wood glue
    • Wood stain or paint (optional)
    • Mounting tape or adhesive

    Let's Build:

    1. Cut and sand: Cut your wood pieces into various sizes and shapes. You can use a jigsaw, handsaw, or even a scroll saw for intricate designs. Sand the edges smooth.
    2. Arrange and glue: Create your desired design by arranging the wood pieces on a flat surface. Once you're satisfied, use wood glue to secure the pieces together.
    3. Apply stain or paint (optional): Give your wall art a cohesive look by applying stain or paint. Let it dry completely before proceeding.
    4. Attach to the wall: Use mounting tape or adhesive to securely attach the wall art to your chosen location.

    Voilà! You've created a stunning piece of wooden wall art that complements your home décor. Get creative with shapes, colors, and textures to make a statement.

    Beyond the Basics: Woodworking for Beginners

    These projects are just a taste of what you can achieve with a little bit of woodworking knowledge and practice. As you become more comfortable, you can explore other exciting projects, like building a small wooden stool, crafting a decorative box, or creating a personalized cutting board.

    Remember, practice makes perfect. Don't be afraid to experiment and learn from your mistakes. The beauty of woodworking is that you can always try again and refine your skills.

    Here are some additional tips for beginner woodworkers:

    • Start small: Choose projects that are manageable in size and complexity.
    • Focus on safety: Always wear eye protection and use appropriate safety gear when working with tools.
    • Invest in quality tools: While you can start with basic tools, investing in high-quality tools will make your woodworking experience more enjoyable and efficient.
    • Join a woodworking community: Connect with other woodworkers online or in person to share ideas, get advice, and learn from each other.
    • Have fun! Woodworking should be a rewarding and enjoyable experience. Don't be afraid to get creative and let your imagination run wild.

    So, what are you waiting for? Pick up those tools, unleash your creativity, and start crafting beautiful woodworking projects that will transform your home. Happy building!