How to Build a Cold Frame for Vegetable Gardens
Building a Cold Frame for Your Vegetable Garden
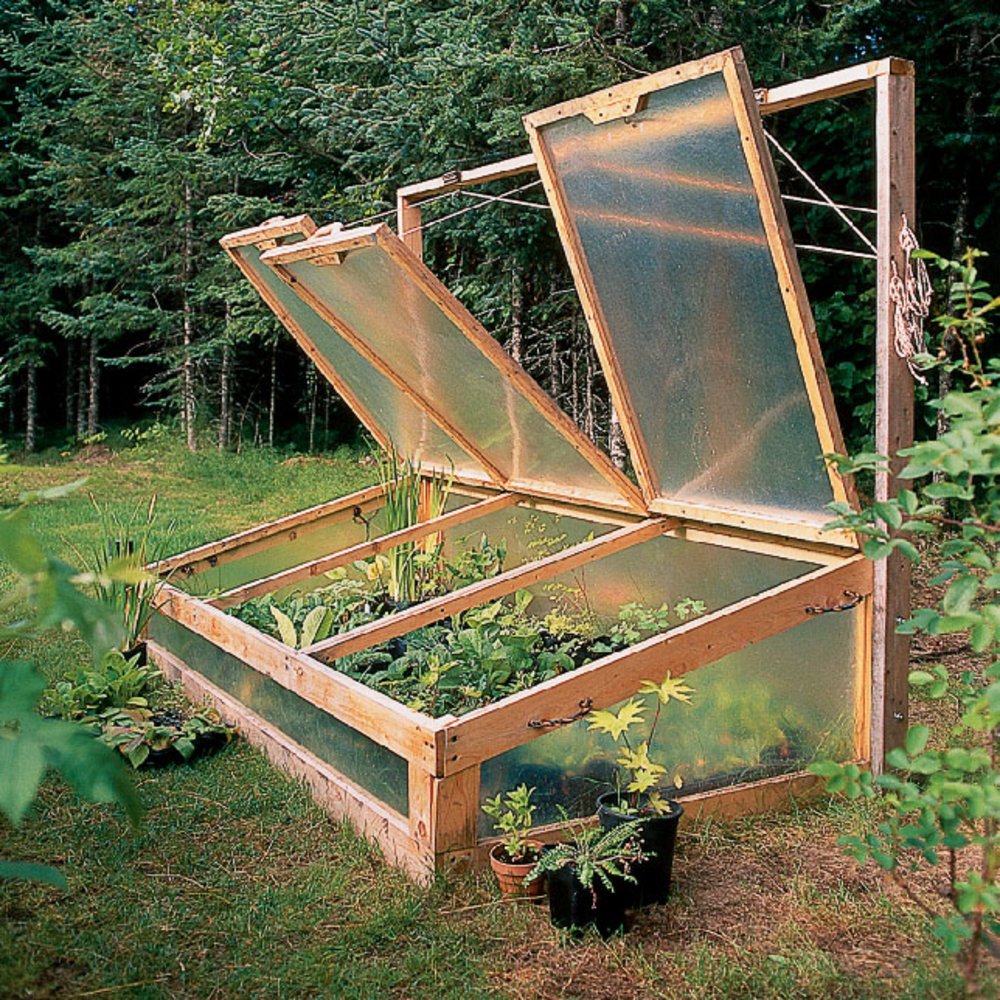
A cold frame is a simple and inexpensive structure that can extend your gardening season by providing a warm, protected environment for your plants. This is especially helpful for starting seeds early in the spring or for keeping tender vegetables growing late into the fall. By creating a mini greenhouse effect, cold frames trap solar heat and protect plants from harsh weather conditions.
Building your own cold frame is a rewarding DIY project that can be tailored to your needs and garden space. This article will guide you through the process, providing step-by-step instructions and tips for success.
Materials You'll Need
Before you begin, gather the necessary materials:
- Wood for the frame: Use sturdy, rot-resistant wood like cedar, redwood, or pressure-treated lumber. Choose 2x4s or 2x6s for the frame and 1x6s for the lid.
- Glass, polycarbonate panels, or clear plastic sheeting: This will form the cover of your cold frame and trap heat.
- Hinges: Choose heavy-duty hinges for the lid.
- Screws or nails: Use weather-resistant screws or galvanized nails for construction.
- Optional: A soil-filled base layer to insulate the cold frame, weather stripping for a tighter seal, and a vent for increased airflow.
Choosing the Right Location
The location of your cold frame is crucial. Choose a spot that receives at least 6 hours of sunlight per day. Ideally, it should be located against a south-facing wall for additional warmth. Also, ensure the area is well-drained to prevent water from pooling inside the frame.
Building the Cold Frame
Constructing the Frame
1. **Cut the wood:** Using a saw, cut the wood for the frame to the desired dimensions. For a standard-sized cold frame, aim for a base of approximately 3 feet wide by 4 feet long and a height of 2 feet.
2. **Assemble the base:** Join the pieces of wood for the base together using screws or nails, creating a rectangular shape.
3. **Construct the sides:** Cut the sides of the cold frame to the desired height and attach them to the base. Ensure the sides are securely fastened.
4. **Build the lid:** Cut the wood for the lid to match the dimensions of the base. Attach hinges to the lid and secure it to the frame.
Adding the Cover
1. **Choose your covering:** Glass is the traditional option, but polycarbonate panels or clear plastic sheeting are also effective and more durable.
2. **Cut the cover:** Measure the opening of the cold frame and cut the glass, panels, or sheeting to size.
3. **Secure the cover:** Use screws or nails to attach the cover to the frame or use a glazing compound for a more secure and weatherproof seal.
Optional Features
1. **Soil Base:** Add a 4-6-inch layer of soil to the bottom of the cold frame for insulation.
2. **Weather Stripping:** Attach weather stripping around the perimeter of the lid for a tighter seal and better insulation.
3. **Ventilation:** For warmer days, install a vent at the top of the lid for increased airflow.
Planting and Care
1. **Prepare the soil:** Fill the cold frame with a well-drained potting mix or garden soil.
2. **Plant your seeds or seedlings:** Sow seeds according to the instructions on the seed packet. Transplant seedlings when they are large enough to handle.
3. **Water regularly:** Monitor moisture levels and water as needed. Avoid overwatering, which can lead to root rot.
4. **Monitor temperature:** Check the temperature inside the cold frame regularly. Adjust the lid or ventilation to maintain optimal temperatures.
5. **Protect from pests and diseases:** Monitor your plants for signs of pests or diseases. Take steps to control any issues that arise.
Enjoy Your Extended Growing Season
With your cold frame built and ready to go, you can extend your gardening season and enjoy fresh, homegrown vegetables for longer. Enjoy the rewards of your hard work as you watch your plants thrive in the protected environment you've created.


0 comments :
Post a Comment
Note: Only a member of this blog may post a comment.