How to Design a Cold Frame for Your Garden
Grow Your Garden with a DIY Cold Frame: An Easy Guide
Hey there, fellow green thumbs! Are you tired of the unpredictable weather playing havoc with your precious seedlings? Do you dream of extending your growing season and getting a jump start on spring? If so, building a cold frame is your ticket to gardening success.A cold frame is basically a mini greenhouse that utilizes the natural warmth of the sun to protect your plants from harsh elements. Think of it as a cozy, protective shelter for your seedlings, allowing them to thrive even when the weather outside is less than ideal. And the best part? Building one yourself is surprisingly simple and affordable.
This guide will walk you through the steps of designing and building your very own cold frame. Get ready to unleash your inner DIY master and start nurturing those seedlings!
Planning Your Cold Frame
Before diving into the construction process, let's brainstorm some key considerations. Think of it as laying the foundation for a thriving cold frame experience.
1. Location, Location, Location!
Where you place your cold frame is crucial. Choose a spot that receives ample sunlight, ideally facing south for maximum sun exposure. The location should also be relatively sheltered from strong winds, as they can chill the air inside your frame.
Consider the layout of your garden and the overall flow. You don't want your cold frame to obstruct pathways or become a tripping hazard. Make sure it's easily accessible for planting, tending, and harvesting.
2. Size Matters
Determine the size of your cold frame based on your gardening needs. Will you be starting seedlings for a small kitchen garden, or are you planning a more ambitious planting project?
A good rule of thumb is to aim for a cold frame that's at least 3 feet wide and 4 feet long. If you have limited space, you can opt for a smaller frame, but remember, the larger the frame, the more seedlings you can nurture!
3. Material Magic
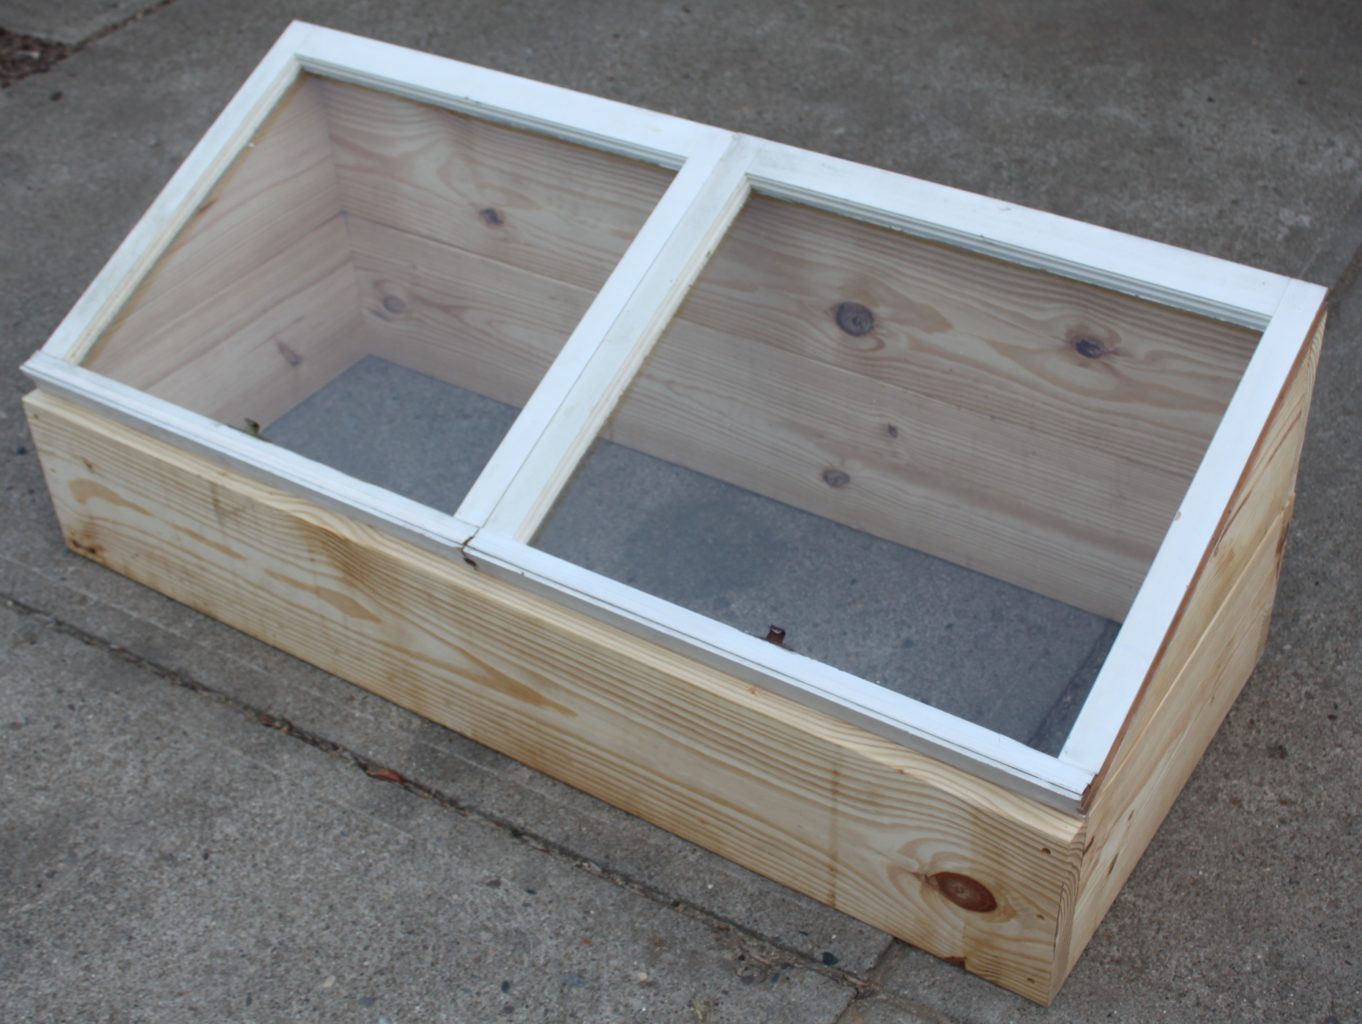
Get creative with the materials you choose. A classic cold frame uses wood framing and glass panes for the top, but you can also explore more modern alternatives like polycarbonate panels or even repurposed windows.
Just make sure the material is clear or translucent to allow sunlight to penetrate and warm the interior.
Here's a rundown of some popular materials:
- Wood: A reliable and sturdy option, easily worked with and readily available. Use pressure-treated lumber for durability.
- Recycled Windows: Give old windows a new life! They offer excellent light transmission and insulation.
- Polycarbonate Panels: Lightweight and durable, these panels are available in various thicknesses and transmit light well.
- Glass: Provides exceptional light transmission but can be heavy and prone to breakage.
Building Your Cold Frame: A Step-by-Step Guide
Now it's time to bring your cold frame vision to life! Here's a step-by-step guide for building a classic wooden cold frame:
1. Get Your Tools Ready
Before you start, gather your essential tools:
- Circular saw or hand saw
- Measuring tape
- Level
- Drill with assorted bits
- Screwdriver
- Safety glasses
- Work gloves
- Clamps
2. Construct the Frame
Build the frame using pressure-treated lumber. You'll need four long pieces for the sides and two shorter pieces for the ends. Cut the wood to the desired length and width, ensuring all corners are square.
Join the wood pieces at the corners using screws, securing them firmly. If you're feeling ambitious, you can add corner brackets for extra strength.
3. Create the Base
Cut a sheet of plywood or exterior-grade OSB to fit the base of the frame. Attach it securely to the bottom of the frame using screws.
For added durability, you can also install a layer of landscaping fabric on top of the base before attaching the plywood. This will prevent weeds from popping up inside your cold frame.
4. Add the Top
Here's where your chosen material for the top comes into play.
For a traditional cold frame, cut glass panes to fit the dimensions of the frame. Use glazing points and glazing putty to secure the panes in place.
If you're using polycarbonate panels, cut them to size using a utility knife or a jigsaw. Secure them to the frame using screws or specialized polycarbonate clips.
If you're working with recycled windows, measure them carefully and adjust the frame accordingly to accommodate their unique sizes. You can use screws, brackets, or even hinges to attach the windows to the frame.
5. Incorporate Hinges
Attach hinges to the top of the frame, allowing you to easily open and close the lid. This will provide ventilation and access for tending your plants.
You can use standard door hinges or specialized cold frame hinges. Make sure the hinges are strong enough to support the weight of the top, especially if you're using glass.
6. Add a Lid Prop
Include a lid prop to keep the top slightly ajar for ventilation. This will prevent condensation buildup and ensure your plants get enough fresh air. You can use a simple wooden prop, a metal latch, or even a rock.
7. Prime and Paint
Give your cold frame a protective layer. Apply a primer to the wood frame before painting it with a weather-resistant paint. This will help prevent rot and extend the life of your cold frame.
Getting Started with Your Cold Frame
Now that your cold frame is complete, let's dive into the exciting part: planting!
First, fill the interior with a well-draining potting mix. You can use a seed starting mix, a general-purpose potting mix, or even a homemade mix of compost, vermiculite, and peat moss.
Next, plant your seedlings. Space them according to their individual needs. Make sure you water them thoroughly, but avoid overwatering, as this can lead to root rot.
To maintain optimal conditions inside your cold frame, monitor the temperature regularly. During cold spells, you may need to cover the frame with a blanket or tarp to provide additional insulation.
On sunny days, open the lid for ventilation and let the fresh air circulate. This will help prevent fungal diseases and ensure your seedlings get the necessary air exchange.
Tips for Cold Frame Success
Here are some additional tips to help you get the most out of your cold frame:
- Start with hardy seedlings: Choose varieties that are known to tolerate cool temperatures.
- Harden off your seedlings: Gradually introduce your seedlings to outdoor conditions before transplanting them into your garden. Start by leaving the lid open for short periods, and gradually increase the exposure time.
- Ventilate regularly: Keep the lid slightly ajar on warm days to prevent overheating.
- Monitor for pests: Check your plants regularly for signs of pests or diseases, and take action to control them immediately.
- Embrace the season: Experiment with different crops and plant types. Use your cold frame to extend your growing season, starting seedlings in the early spring or nurturing them in the late fall.
Remember, gardening is a journey of discovery. With a little creativity, patience, and a cold frame by your side, you can enjoy a bountiful harvest year-round. Happy gardening!


0 comments :
Post a Comment
Note: Only a member of this blog may post a comment.